Heart Cakesicles {How to Make}
Disclosure: This post may contain affiliate links. When you click on a link and/or make a purchase, I may be paid a small commission at no additional cost to you. Additionally, as an Amazon Associate I earn from qualifying purchases. Please read my Disclosure page for more information.
Heart Cakesicles are made with strawberry cake, coated in a decadent layer of Ghiradelli chocolate and dusted with sprinkles. They make a fantastic edible gift or dessert option for any special occasion.
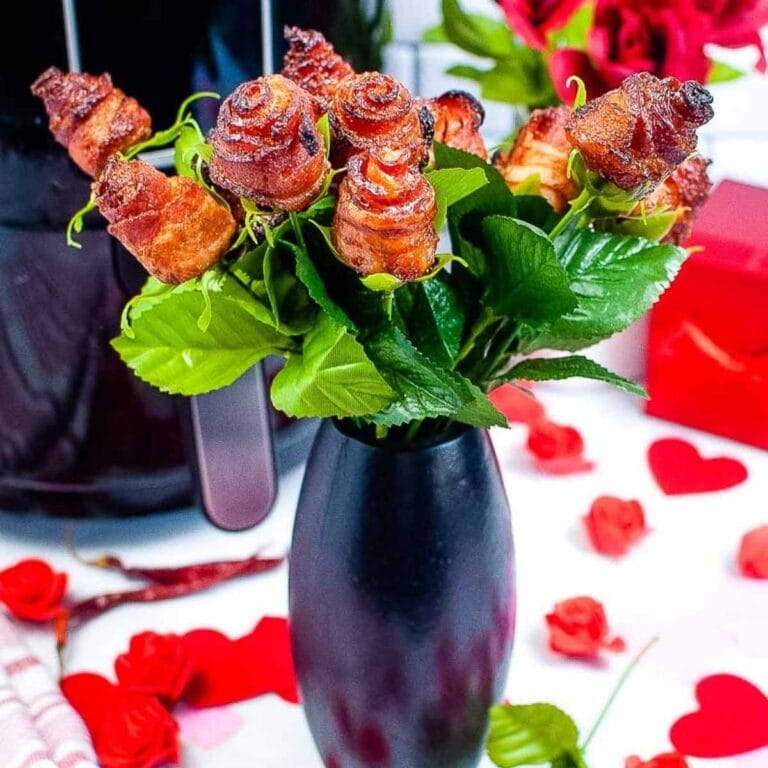
With Valentine’s Day just around the corner love is in the air. And what better way to show your love than with holiday themed food. Whether you go the savory route with make bacon roses bouquet or traditional sweet treats like cheesecake bars with raspberry swirl, your sweetheart is sure to appreciate your thoughtfulness.
Today we’re whipping up a batch of heart shaped cakesicles. While I was making them, it dawned on me that these would be great for any special occasion. Or anytime you get a hankering for a decadent treat or want to be creative in the kitchen.

Enter your email & I’ll send it to your inbox. Plus, get great new recipes from me every week!
We’re sharing tips to help you get the best results with this recipe. If you don’t need the tips, scroll to the bottom for the full recipe and a printable recipe card.
What Are Cakesicles?
Think of cakesicles as a larger version of a cake pop. The latter is a one-bite size piece of cake on a stick. Cakesicles tend to be larger treats and are typically made in fun shapes.
Instead of using a lollipop stick, you’ll use a popsicle stick. And the outside is typically coated in some sort of chocolate coating and decorated with sprinkles.
Even though cakesicles are similar to a cake pop, I prefer making cakesicles. The process is a little more in-depth, but it’s perfect for those times you want more than a tablespoon of cake on a stick.
RED & PINK
Valentine’s Desserts
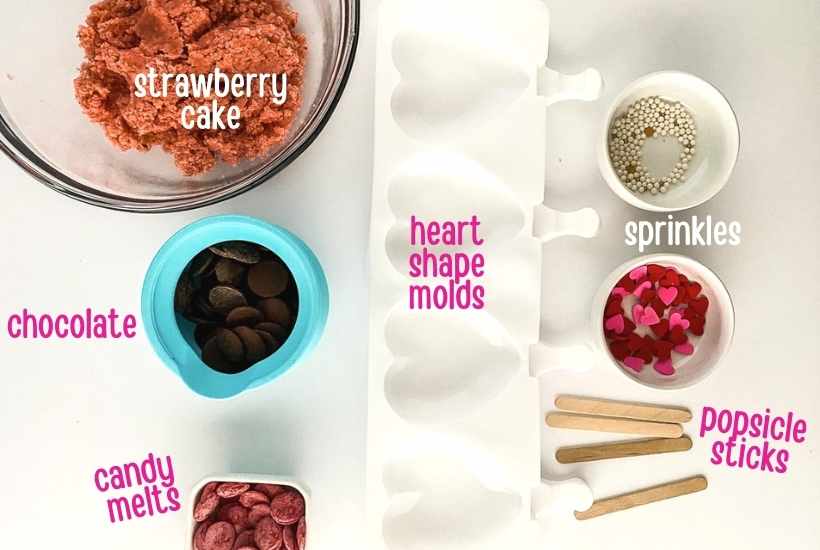
Heart Cakesicle Ingredients
Strawberry cake – you’ve got a couple of options here. You can use a store-bought strawberry cake, make a cake using a boxed strawberry cake mix or use your favorite homemade recipe. If you’re using a boxed mix, make sure you have the additional ingredients as noted on the box.
Ghirardelli Milk chocolate melting wafers
Red candy melts – these are for decorating so feel free to grab a variety of colors
Sprinkles
Gadgets and Tools Needed to Make Cakesicles in the Shape of a Heart
Heart shaped silicone mold
Popsicle sticks
Parchment paper
Food processor – you can also use a blender
How to Make Heart Shaped Cakesicles
Making the Cake Dough
If using a boxed mix, prepare the strawberry cake according to the instructions on the box. Once it has finished cooking, allow it to cool before proceeding.
Break up the cake into large chunks and add it to a food processor or blender. Pulse until you have cake crumbs.
Add a tablespoon of water to thin it out a little bit, then mix for a couple more minutes.
Pour in one more tablespoon of water and mix for another 30 seconds. At this point, you should have a cake dough texture. If not, continue mixing in 30 second intervals.
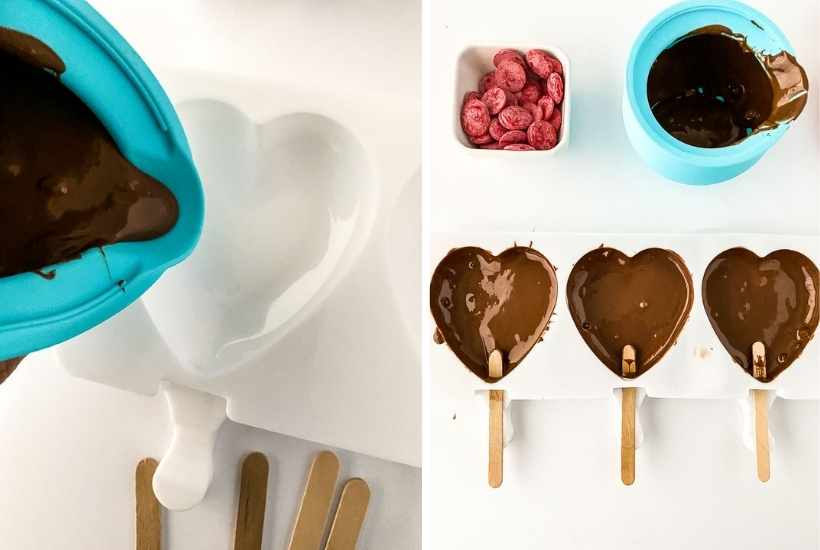
Melting the Chocolate
Place the chocolate wafers in a microwave-safe bowl and melt in 30-second increments. We like to use these silicon melting pots because you can melt the chocolate in the pots and then use them to pour the chocolate into the molds.
Pour the melted candy wafers into the heart shaped molds (about a tablespoon), making sure to spread the chocolate up the sides. You can use a brush or the backside of a spoon to spread the chocolate around.
Pro Tip
If you’re feeling artistic and want to paint a design on the outside of the cakesicles, do that before adding the chocolate to the mold. This will give a smoother-looking texture versus decorating with sprinkles and additional chocolate.
Insert the popsicle sticks a third of the way into the mold. Make sure they are laying flat and not pointing downward. They should hover just above the chocolate layer.
Place the chocolate-filled molds in the freezer to allow them to set.
After about 15 minutes, remove the molds from the freezer and add the cake dough to each heart. Press the cake in gently to keep the chocolate from cracking.
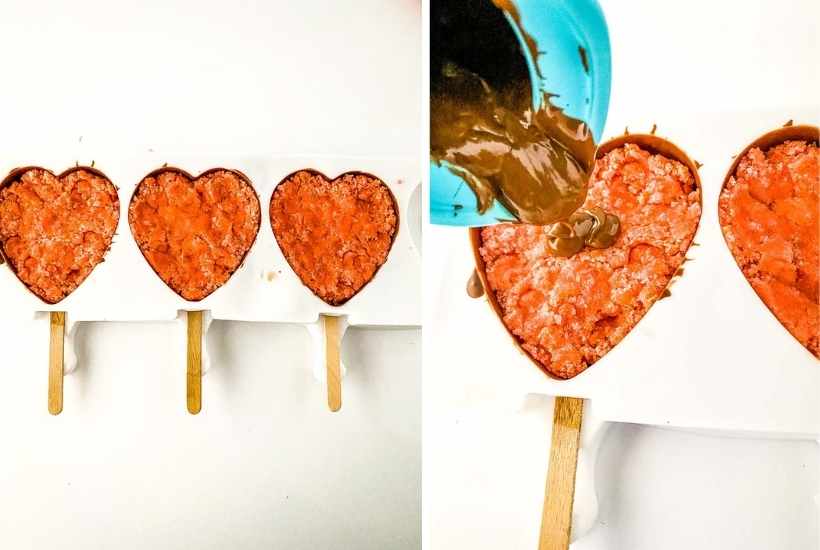
Cover the cake with more melted chocolate, spreading it as close to the edge as possible. Clean up the edges if the chocolate leaks over – it makes it easier to remove the cakesicles from the molds.
Freeze for another 10 minutes.
Carefully pull the silicon molds away from the cakesicles and place them on a sheet of parchment paper.
Decorating Ideas for Cakesicles
Microwave the red candy melts in 30 second increments until they are smooth. Pour melted chocolate into a piping or plastic bag.
Snip the tip off and start decorating by making zig-zag, circled, or lined patterns. There are no rules here so have a little fun with it!
Add the sprinkles immediately, before the chocolate dries.
Allow them to set a few minutes before serving.

Tips for Melting Chocolate
- Heating the chocolate in 30 second intervals keeps it from overheating.
- Do not overheat the chocolate or it will curdle and turn grainy.
- Using a high quality chocolate will give you better results.
- You can also use the double boiler method, but microwaving is much easier and less clean up.
- If your chocolate comes out too thick, thin it with a little coconut oil.
- To extend the time of keeping the chocolate melted without having to reheat, place the bowl of melted chocolate into a slightly larger bowl filled with hot water.
Storing Heart Cakesicles
If you are going to package the strawberry cakesicle in bags for treats, make sure the chocolate is set before bagging them up. About 30 minutes should do the trick.
Otherwise, keep these in an airtight container on the counter for up to 5 days. But I doubt they’ll last that long!

More Cakesicle Ideas
Here are some more variations of cakesicles for other holidays and occasions.
- Use any boxed cake mix to change the flavor. Confetti, chocolate, white, yellow, or Devil’s Food are good choices.
- Depending on the holiday or occasion, different colored candy melts and sprinkles can be used for decorating.
- Substitute brownies for cake to make “browniesicles”.
- For a festive look, tie a small ribbon bow around the sticks before serving.
- Use white chocolate for the outer coating.
- Use other mold shapes.
- To make a 3D heart shape or geometric cakesicles, just swap out the molds for those.
More Easy Desserts To Try:
- Mason Jar Chocolate Chip Cookies (+ Printable Tags)
- Coconut Lime Sugar Cookies
- Banana Pudding Pops
- Root Beer Float Popsicles {2 Ingredients!)
- No Bake Eclair Cake {Homemade Glaze}
- Cast Iron Skillet Cookie
**Save Heart Cakesicle Recipe for Later**

This post was shared at the Weekend Potluck.

Heart Shape Cakesicles
Equipment
Ingredients
- 1 Strawberry cake, 9×13, prepared & cooled
- 2 Tablespoons Water
- 32 ounces Ghirardelli Milk chocolate melting wafers
- Red candy melts
- Sprinkles
Instructions
Making the Cake Pop Dough
- Add chunks of cake to the food processor and start blending on the thick setting, Low speed, for about 1-2 mins. Stir the cake to make sure the large pieces are broken up.
- Change the setting to thin and the speed to High. Mix for 1 minute and stir. Pulse a few times to make sure the cake is completely broken up.
- Add 1 tablespoon of water and mix for another 2-3 minutes. You will see the cake crumbs forming (it looks a little like a tornado).
- Add one more tablespoon of water and mix on High speed for about 30-45 seconds. You should now have a dough.
Assembling the Cakesicles
- After making the strawberry cake pop dough, melt the chocolate wafers in the microwave at 30 second intervals, stirring after each cycle, until fully melted.
- Pour about a tablespoon of chocolate into heart shaped molds, brushing the chocolate up the sides until completely covered.
- Slide the popsicle sticks about a third of the way into the mold, making sure the sticks are flat and not pointing downward (the sticks should hover above the chocolate layer). Place mold in the freezer for 15 minutes, making sure the mold is level.
- Remove mold from freezer and carefully add about a tablespoon of the cake pop dough to the molds, making sure it's evenly distributed through the mold. Do not press too hard or the chocolate may crack. Make sure to leave space for the second layer of chocolate.
- Cover the cake pop dough with chocolate, about a teaspoon should do it. Remove excess chocolate with a bench scraper or an offset spatula. Place back in freezer for 7-9 minutes.
- Carefully peel molds away and remove the cake pops. Place on parchment paper.
- Melt the red candy melts in the microwave for 30 second intervals, stirring after each cycle, until melted and smooth. Place melted chocolate in a piping bag.
- Let rest for 1-2 minutes before cutting a small hole in the tip of the piping bag. Decorate by creating zigzag, circles or lined patterns. Immediately add sprinkles, before the chocolate has time to set.
- Let rest for 10-15 minutes before serving.
Notes
- We like to use silicone melting pots to melt the chocolate. These also are great to use if your kids are helping.
- Change the chocolate and decorations for other holidays and special occasions.
- If packaging these for treats, allow them to rest for 30 minutes before bagging to avoid smudges.
- Leftover cake pops will keep for 3-5 days on the counter or 7-8 days in the refrigerator. Condensation may collect on the chocolate if stored in the refrigerator.
- The quantity may vary based on the size of cake used.
- Nutritional information will vary based on cake and decorations used.
Nutritional Estimate
Nutritional information is provided as a reference, using an online calculator. We recommend verifying the information independently for accuracy.