Disclosure: This post may contain affiliate links. Please read my Disclosure page for more information.
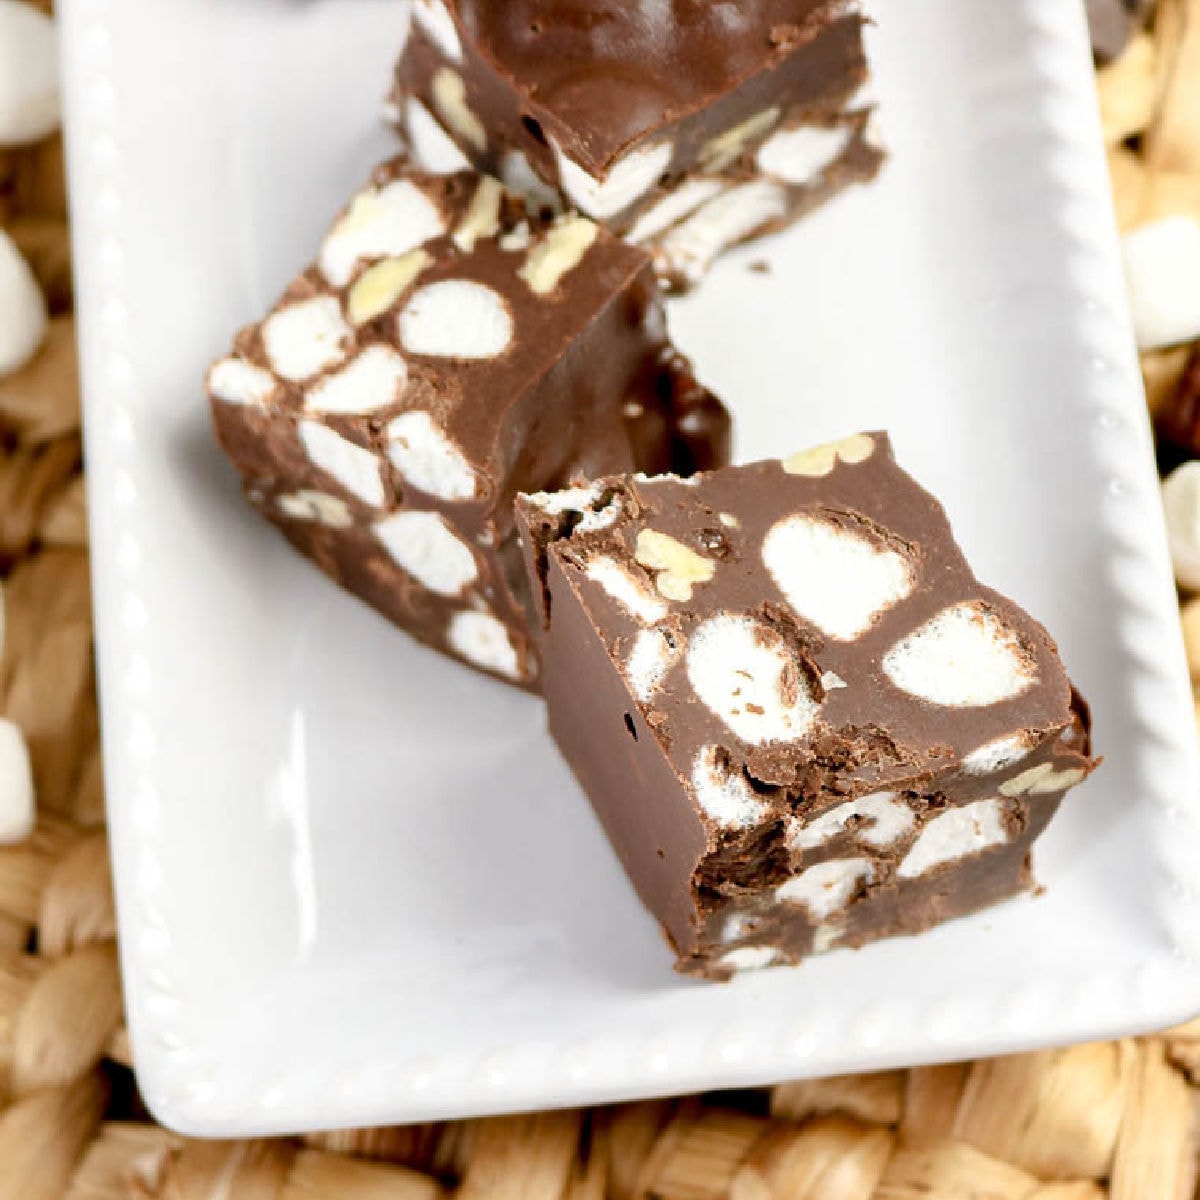
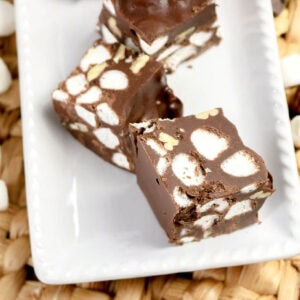
Our Rocky road candy recipe is an easy, no-bake sweet treat made with melted chocolate, chewy marshmallows, and crunchy nuts. And it’s ready in less than 1 hour, making it a great choice for last minute entertaining.
Some candy recipes require hours of time, a double boiler, and a candy thermometer. But not this one! I promise, this is one of the easiest treat recipes you will ever make.

We’re sharing tips to help you get the best results with this recipe. If you don’t need the tips, scroll to the bottom for the full recipe and a printable recipe card.
This candy is a great addition to your holiday cookie trays or if you like making edible gifts for friends and family. Try our brown sugar candied walnuts or birthday cake puppy chow for more tasty gifts from your kitchen.
If you love the flavor combo of melty chocolate and soft marshmallows, you have to see the fun twist I put on it to make Grinch rocky road candy clusters.
And when you find yourself with leftover marshmallows, use them up by making a batch of our hot chocolate cookies – they’re another favorite treat for the fall and holiday season.
Why is it called Rocky Road?
You may recognize this candy by the iconic ice cream flavor! While the name comes from the candy looking like a bumpy road, the flavor combination originated during the Great Depression. The ingredients were affordable enough to allow families who were going through a difficult time to enjoy a little sweet treat.
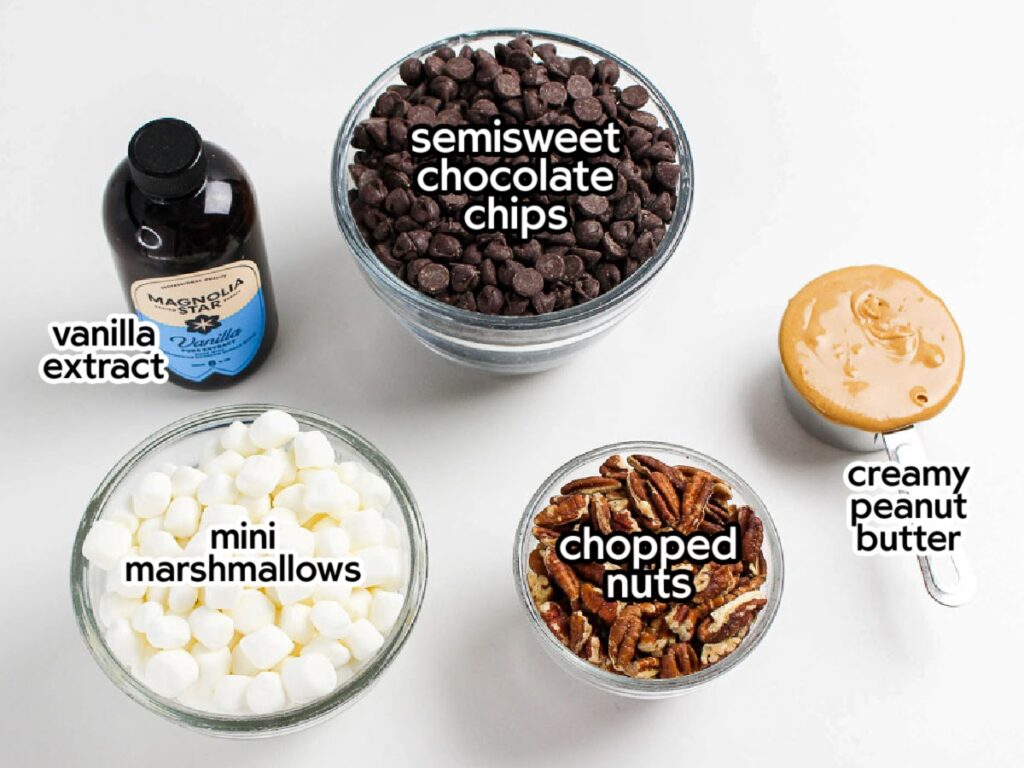
Rocky Road Candy Ingredients Needed
- Semi-sweet chocolate chips – this kind keeps the candy from being too sweet. Be sure to use a high quality chocolate for the smoothest texture.
- Creamy peanut butter – even though it’s optional, it makes the candy creamier.
- Vanilla extract – enhances the chocolate flavor and balances the richness.
- Marshmallows – use the mini-sized mallows.
- Chopped nuts – walnuts, pecans, almonds or peanuts can be used.
Get the complete ingredients & directions in the recipe card below.
How to Make Homemade Rocky Road Candy
Line an 8×8-inch dish with parchment paper, making sure the paper hangs over the sides.
In a microwave-safe bowl, heat the chocolate chips and peanut butter (if using) in 30-second bursts, stirring after each round, until smooth and fully melted.
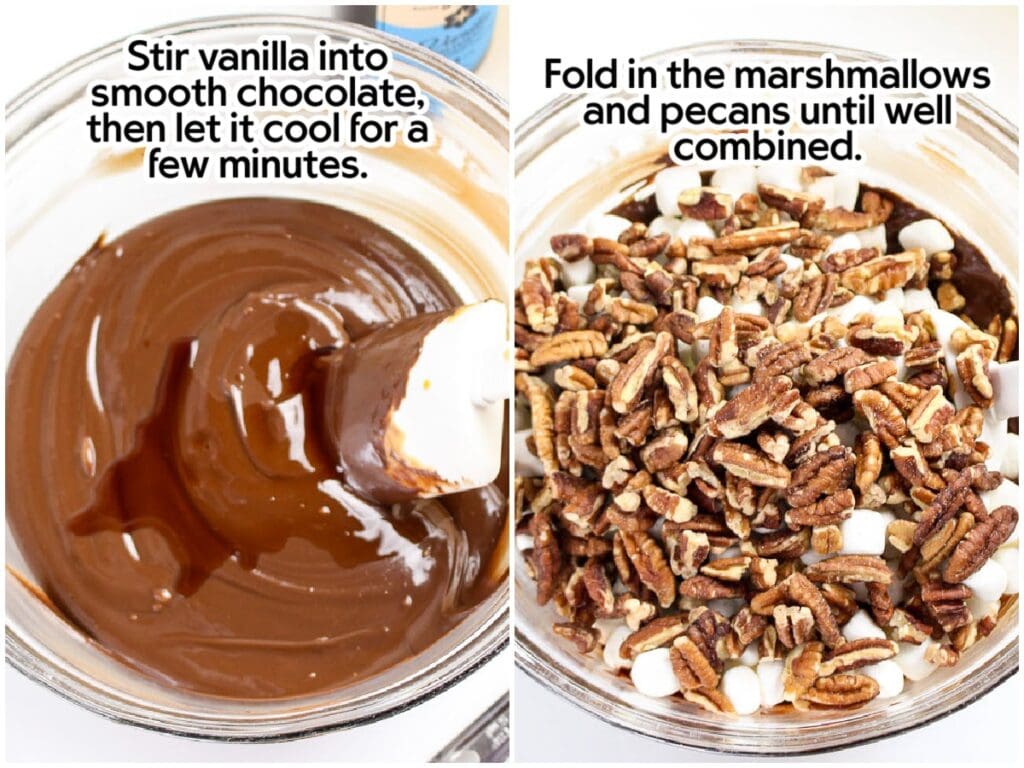
Mix in the vanilla and let the chocolate mixture sit for a couple of minutes to cool slightly.
Add the mini marshmallows and chopped nuts, gently folding until everything is evenly coated with chocolate.
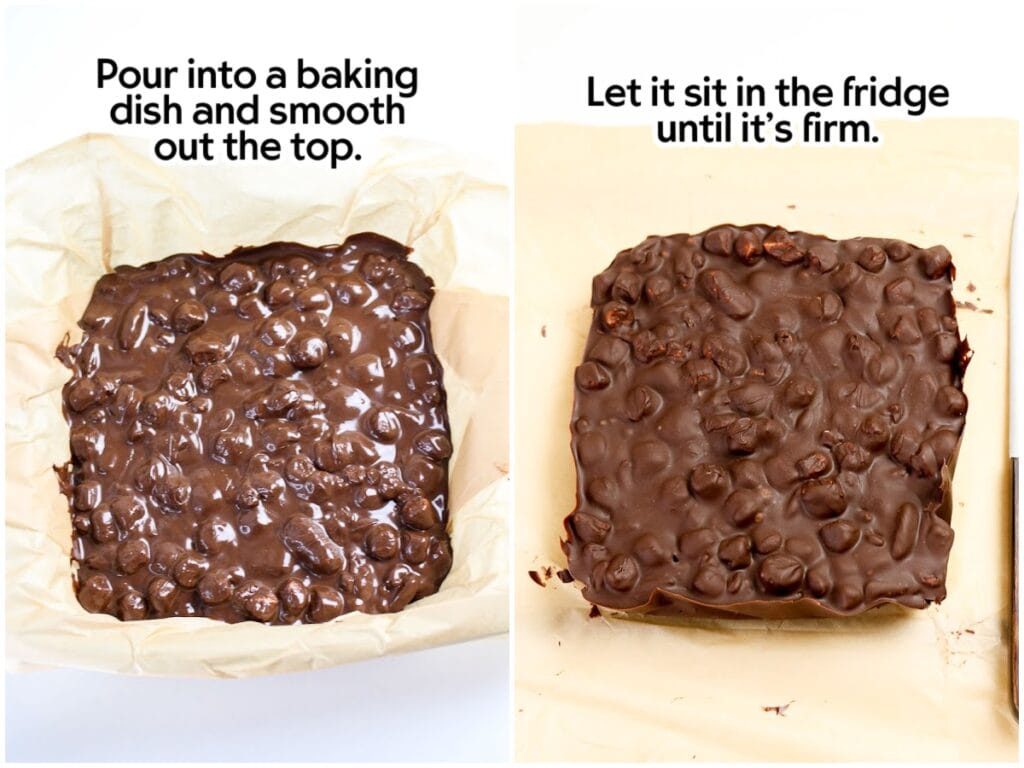
Transfer the mixture to the lined pan and spread it out evenly. Chill for about 30 minutes, or until the candy becomes firm.
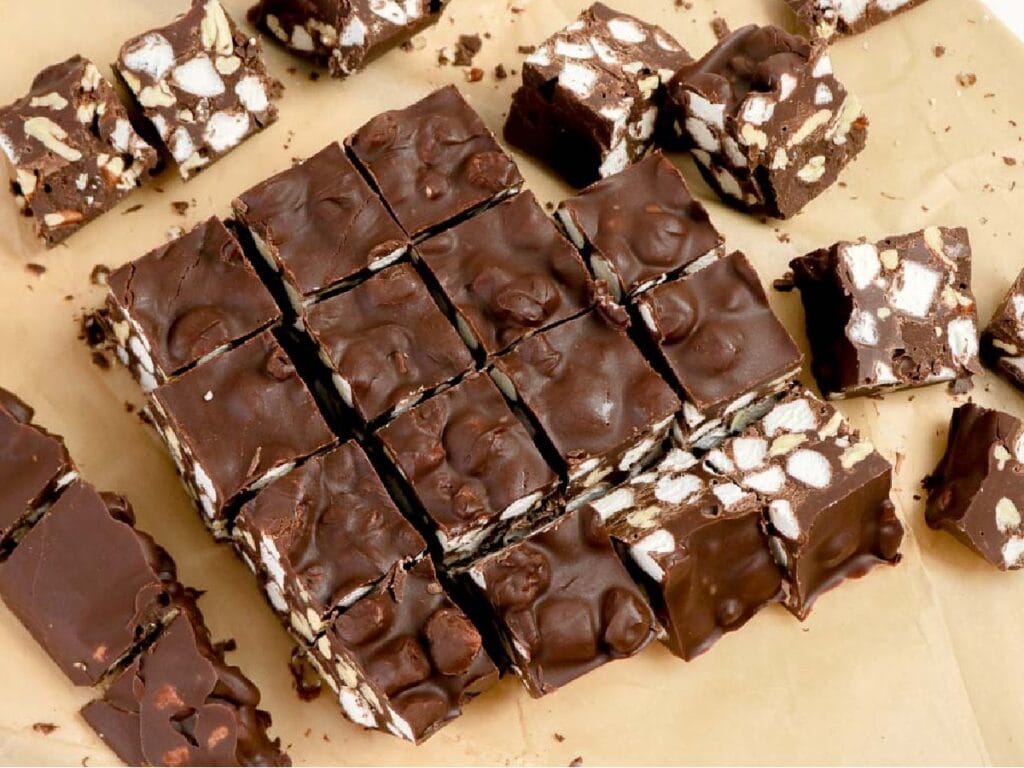
Lift the slab of candy out by grabbing the edges of the parchment paper, then slice into squares to serve.
Tips for Making Rocky Road Candies
- Letting the parchment paper hang over the edges of the pan makes it easier to lift the candy bar out of the pan.
- Warm the chocolate in short microwave bursts or over low heat to keep it smooth and prevent scorching.
- Cool the chocolate 2-3 minutes before adding the marshmallows so they hold their shape instead of melting.
- Toast the nuts to add more flavor.
- Use a serrated knife when slicing so the squares are neat.
Recipe Substitutions & Variations
- Chocolate variations: Try dark chocolate, milk chocolate, or even a mix of both. White chocolate also works for a fun twist.
- Add-ins: Mix in crispy rice cereal, crushed pretzels, dried cherries, or shredded coconut for extra texture.
- Holidays: Use white chocolate and tint it with gel food coloring for a festive twist.
What to Serve with Homemade Candy
These bars are a great addition to cookie trays and dessert tables. For the holidays, pair them with crockpot Christmas crack, cornflake wreaths, and even chocolate covered cookie dough bites.
How to Store Leftover Rocky Road Bars
Leftover candies can be kept in an airtight container in the refrigerator for up to 2 weeks. Before serving, let them soften at room temperature for a few minutes.
Can I make rocky road candy ahead of time?
You can make it up to 2 weeks in advance. Store it in the refrigerator or freezer until you’re ready to serve.
Can I freeze rocky road candy?
Store it in a freezer-safe container for up to 2 months. Thaw in the fridge overnight, then let it sit at room temperature for a few minutes before eating.
Why did my marshmallows melt in the chocolate?
The chocolate was probably too hot. It’s important to let it cool for a few minutes before folding in the marshmallows so they maintain their shape.
Whether you’re baking for the holidays, or just want an easy candy recipe to satisfy a sweet tooth craving hits, our easy rocky road candy recipe checks all of the boxes.


Enter your email & I’ll send it to your inbox. Plus, get great new recipes from me every week!
Old-Fashioned Rocky Road Candy
Ingredients
- 3 cups semisweet chocolate chips
- 1/2 cup creamy peanut butter, optional, but it adds creaminess
- 1 teaspoon vanilla extract
- 2 cups mini marshmallows
- 1 cup chopped nuts, walnuts, pecans, or almonds
Instructions
- Line an 8×8-inch pan with parchment paper.
- Melt the chocolate chips (and peanut butter, if using) in a microwave-safe bowl in 30-second intervals, stirring in between each heating cycle, until the mixture is smooth.3 cups semisweet chocolate chips, 1/2 cup creamy peanut butter
- Stir in the vanilla extract.1 teaspoon vanilla extract
- Allow the chocolate to cool for 2-3 minutes.
- Fold in the mini marshmallows and chopped nuts until well combined.2 cups mini marshmallows, 1 cup chopped nuts
- Pour the mixture into the prepared pan and spread evenly.
- Refrigerate the pan for about 30 minutes, or until firm.
- Remove candy from the pan and cut the candy into squares with a serrated knife for serving.
Notes
- Allow the parchment paper to overhang the edges of your pan. It will make it easier to lift the candy out for cutting.
- It’s OK to omit the nuts if you don’t like them.
- For extra flavor and crunch, toast the nuts first – simply bake them at 350°F for 5–7 minutes until fragrant. Keep a close eye on them so they don’t burn.
- Don’t rush heating the chocolate. You want to melt it slowly over low heat or in short microwave bursts, stirring often, to keep it smooth and glossy.
- It’s important to let the chocolate cool a bit before adding the marshmallows, to keep them from melting into the warm chocolate.
- For the cleanest cuts, use a serrated knife to cut the candy. This will prevent the marshmallows from getting squished, too.
- Store in the refrigerator in an airtight container. When you’re ready to serve, let the pieces sit at room temperature for a few minutes so they can soften up a bit.
- For longer storage, place in a freezer-safe airtight container for up to 2 months. Thaw in the fridge overnight before serving.
- Candy can be made up to 2 weeks ahead of time – just store it in the fridge or freezer.
Nutritional Estimate
Nutritional information is provided as a reference, using an online calculator. We recommend verifying the information independently for accuracy.