
Disclosure: This post may contain affiliate links. Please read my Disclosure page for more information.
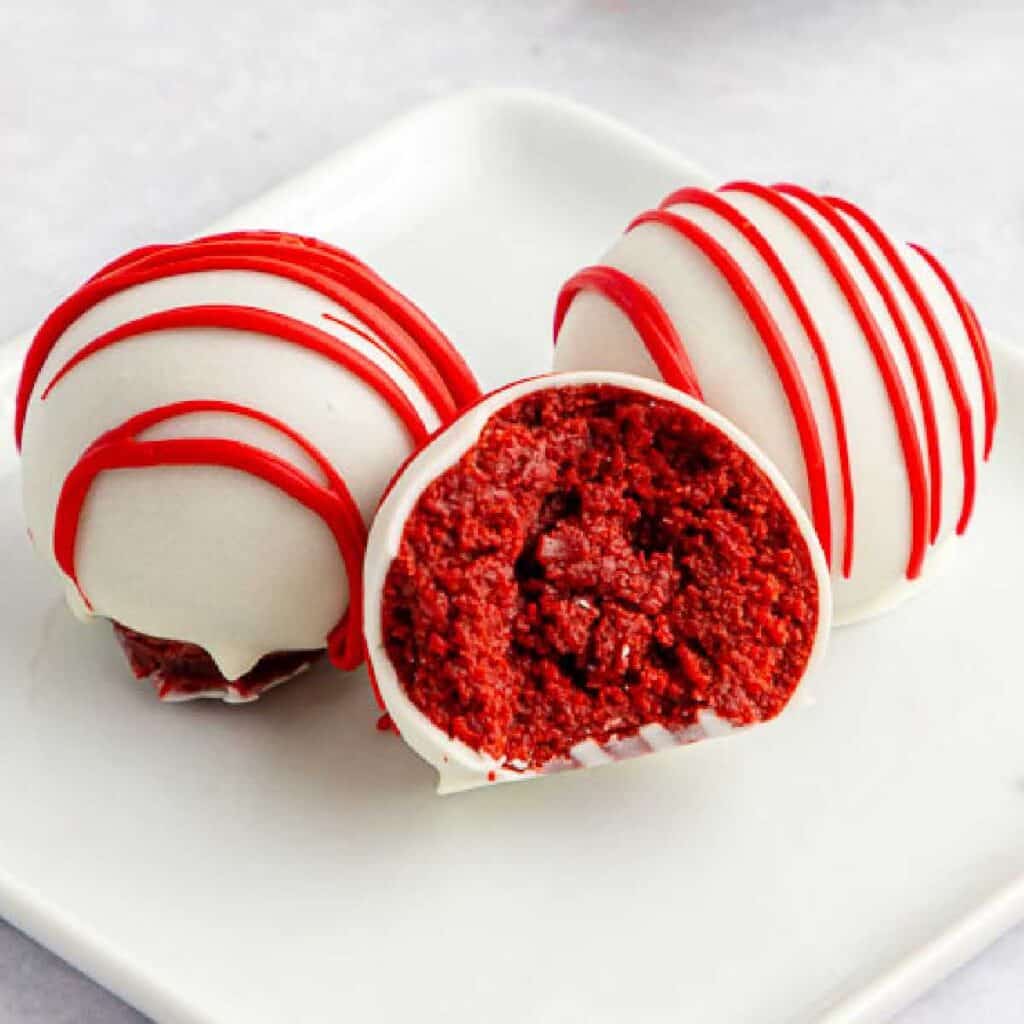
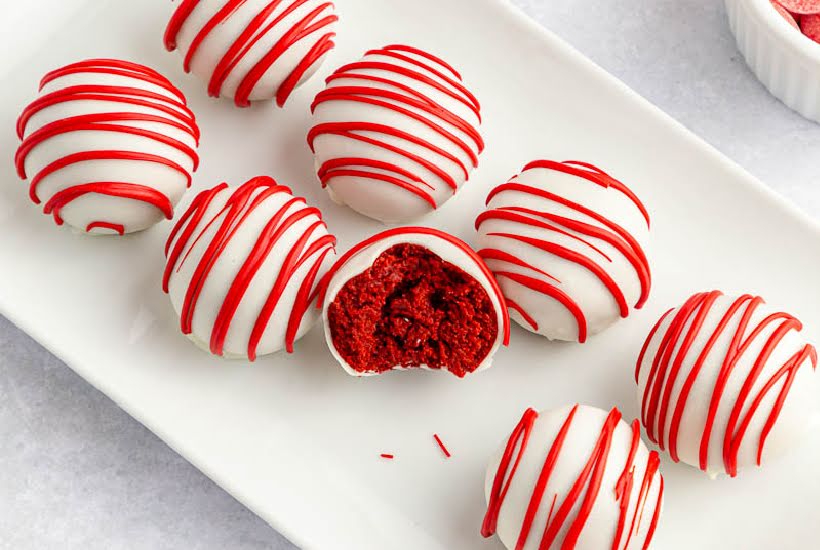
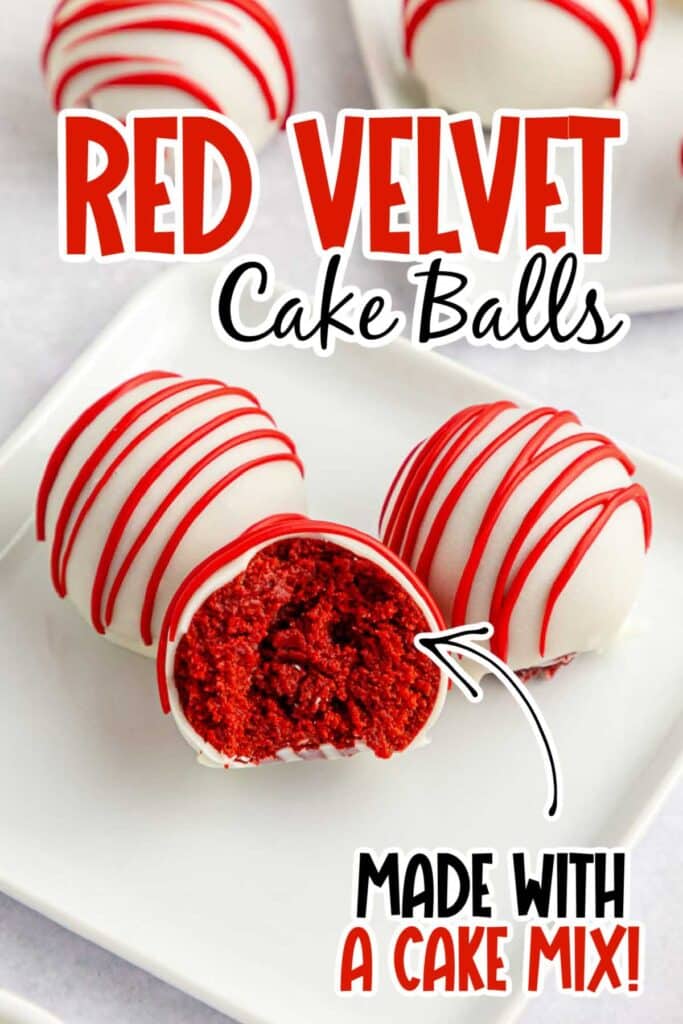
No bake Red Velvet Cake Balls are a delectable bite-sized dessert made with 4 simple ingredients. Covered in a melted candy coating, this homemade treat is perfect for holidays and special occasions.
The red color of the cake is an attention grabber, especially at the holidays. But it’s the combination of rich chocolate flavor, cream cheese and a candy coating that takes this homemade treat over the top.
It’s nice to have an easy dessert recipe, especially when the baking season is in full swing. And don’t forget these easy party treats also make a tasty edible gift option (these lemon cake balls are a fun spring treat).
We’re sharing tips to help you get the best results with this recipe. If you don’t need the tips, scroll to the bottom for the full recipe and a printable recipe card.
The gorgeous red color of this fun dessert is also the perfect Valentine’s Day treat. Next time, I may turn this recipe into a full-blown cakesicle and use the marbling technique with almond bark.
The combination of velvety red cake, cream cheese and chocolate is sure to satisfy your sweet tooth cravings. So what are you waiting for? If you love red velvet flavors be sure to try our red velvet cinnamon rolls or these Crumbl pink velvet cookies– they’re amazing!
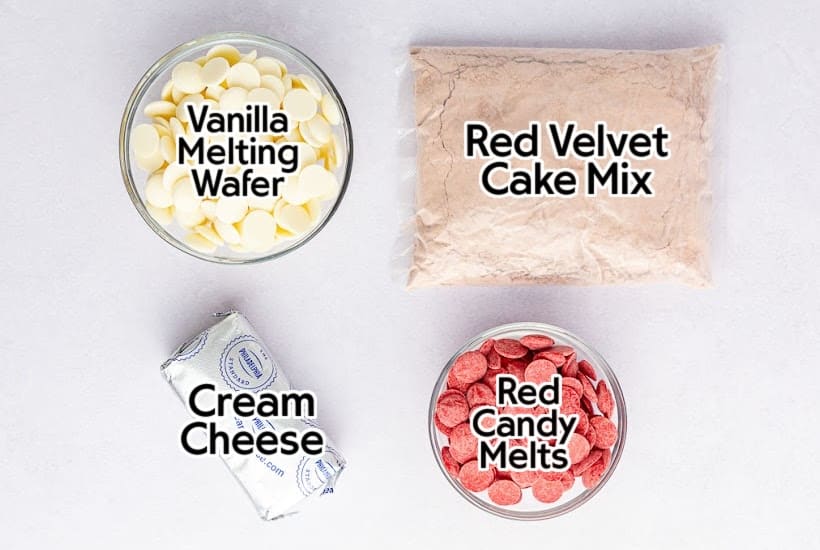
Ingredients Needed to Prepare Red Velvet Cake Balls
- red velvet cake mix – I used a Betty Crocker mix but you can use your favorite brand. Note: we’re not following the package directions.
- cream cheese – soften at room temperature so it’s easier to mix.
- vanilla melting wafers – we love Ghirardelli because it’s a high-quality chocolate and does well for the coating. If you can’t find these, you can use Ghirardelli white chocolate chips.
- red candy melts – the Wilton brand is fine because we are only using it for decoration.
Get the complete ingredients & directions in the recipe card below.
How to Make No Bake Red Velvet Cake Truffles
Line a cookie sheet with parchment paper and preheat the oven to 350 degrees F.
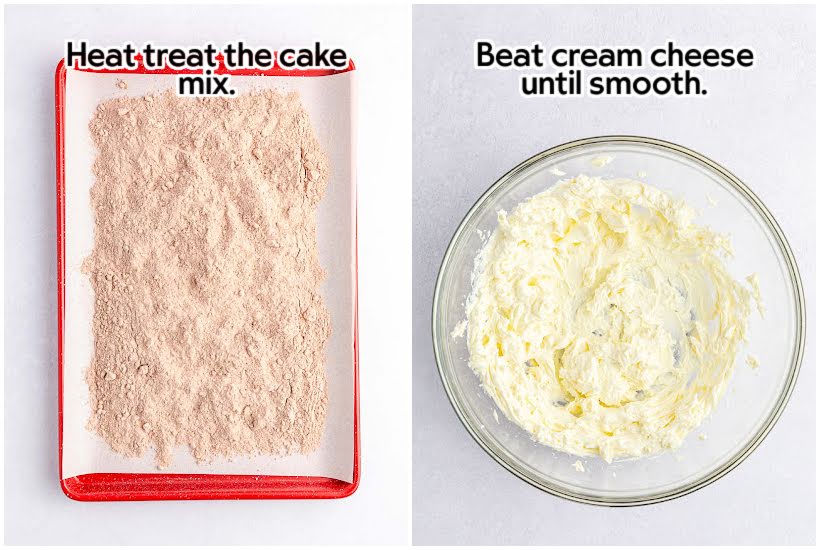
Spread the contents of the box of cake mix onto the parchment-lined baking sheet. Bake for 5 minutes to heat treat the mix, ensuring that it reaches 165 degrees F. Allow it to cool completely before proceeding.
Add the cream cheese to a large bowl and beat with an electric mixer until smooth.
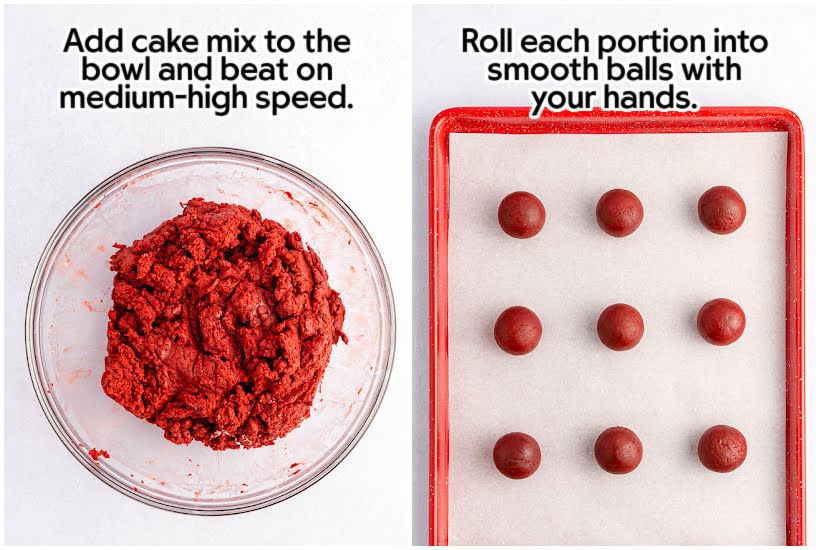
Mix in the cooled, heat-treated boxed cake mix and beat on medium high speed until it turns into a cookie dough like consistency.
Line two more baking sheets with parchment paper or wax paper. Use a 1.5 tablespoon cookie scoop to portion out the cake batter into little dough balls.
Roll the dough balls between the palms of your hands until smooth then place onto the lined baking sheet. Let them rest for 15 minutes to come closer to room temperature before dipping.
Use a double boiler to melt the candy wafers over low heat, stirring occasionally until smooth. If desired, add the wafers to a bowl and microwave in 30 second intervals, stirring between each cycle until they are fully melted.
Use a fork or chocolate dipping tool to dip cake balls into the melted candy. Gently tap the fork on the side of the bowl a couple of times so the excess chocolate drips off.
Place the coated cake balls onto the lined baking sheet. Repeat for the remaining balls of cake, leaving about 2 inches in between each one.
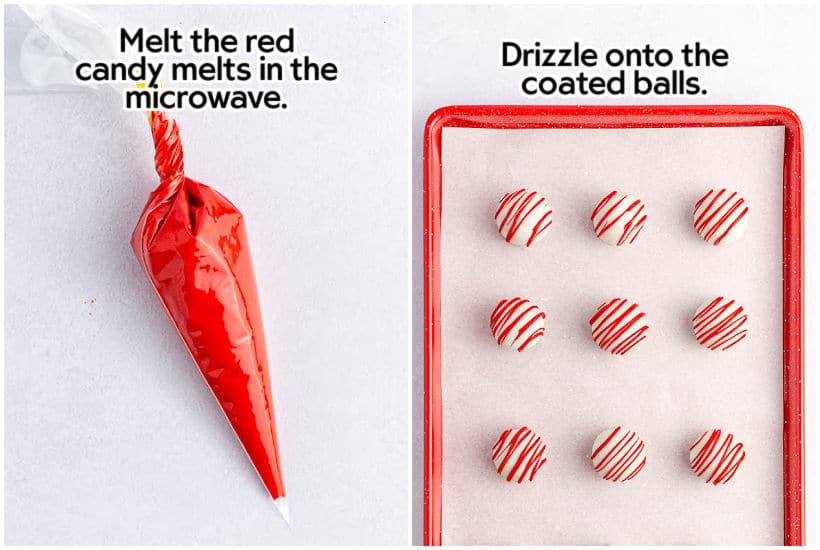
Place the red candy melts in a bowl or microwave-safe piping bag and melt in the microwave on a low or defrost setting until fully melted. Transfer to a piping bag if you used a bowl. Make sure the coating is smooth and that there aren’t any lumps. Snip off the tip then drizzle on the melted chocolate to decorate the red velvet treats.
Allow the chocolate to set completely before serving or storing.
Why Does the Flour Need Heat Treating?
Because raw flour can contain bacteria like salmonella. When we bake cakes we don’t have to heat treat the mix because the batter is baked before we eat it.
For this recipe, since it’s a no bake dessert, we need to ensure the cake mix reaches 165 degrees F to kill any bacteria that could cause us to get sick.
Tips for Making Cake Balls with Red Velvet Cake Mix
- You can heat treat the cake mix in the microwave by adding it to a bowl, and microwaving for 3 minutes. Stir the mix every 30 seconds to avoid hot spots and to ensure it’s heated through evenly.
- Chilling the dough makes it easier to roll the cake balls.
- Allowing the rolled balls to rest at room temperature is the best way to prevent the melted chocolate coating from cracking.
- For best results, use a high quality brand of wafers and chocolate. The Ghirardelli brand works best for dipping.
- Using the double boiler method yields the best results when melting chocolate because it keeps it from seizing.
- Some candy melts will thicken more as they are microwaved versus actually melting, so you want to avoid repeatedly reheating the batch.
- I don’t recommend using the Wilton candy melts for dipping because they tend to clump faster. But they work well for decorating.
Recipe Substitutions and Variations
- Other flavors – swap the red velvet box mix for any of your favorites, including chocolate cake to make cake balls that coordinate with other holidays and treats you may serving.
- Decoration – you can decorate with finely chopped nuts, sprinkles, cake crumbs, or graham crumbs as long as they are added before the coating sets up.
- Chocolate coating – The white chocolate coating pairs nicely with the cream cheese and red velvet flavor, but you can use the same technique with a dark or milk chocolate coating if you are changing up the cake flavor.
- Piping bag alternative – if you don’t have piping bags, you can achieve similar results using a Ziploc bag. Add the melted coating to the bag, seal it and snip a small piece from the corner of the bag to pipe out your decorations.
How to make red velvet cake pops
After you’ve molded the cake balls, dip one end of a lollipop stick into the melted white chocolate candy melts and insert the coated end into a cake ball. Following the directions, dip the cake bites then place in a cake pop stand to allow the coating to set up.
You can package these treats as a fun edible gift for class parties, showers and hostesses. After the pops have set up, place in cellophane bags and tie off with a pretty ribbon to give as gifts.
Can you make red velvet cake bites ahead of time?
Yes! This is a great option if you want to get a head start on party prep or baking for the holiday season.
Mix the ingredients and follow the instructions for rolling out the cake balls. Store the uncoated cake balls in the refrigerator or freezer in an airtight container until you are ready to dip and serve. When you’re ready to dip, let them come to room temperature before dipping.
How to store leftover cake balls
Leftover red velvet truffles can be refrigerated for up to 5 days in an airtight container.
More Cake Ball Recipes And Bite Size Treats
- Strawberry Cake Balls (Made with Cake Mix)
- Biscoff Truffles
- Peppermint Cake Balls (Easy Cake Pops)
- Red White and Blue Oreo Balls
- Chocolate Covered Cookie Dough Bites
Enter your email & I’ll send it to your inbox. Plus, get great new recipes from me every week!

Red Velvet Cake Balls
Equipment
Ingredients
- 15.25 ounce red velvet cake mix, I used a Betty Crocker mix
- 8 ounce block cream cheese, softened to room temperature
- 2 10- ounce bags Ghirardelli vanilla melting wafers
- ½ cup Wilton red candy melts
Instructions
- Preheat the oven to 350°F.
- Heat treat the cake mix: line a baking sheet with parchment paper and spread the unprepared cake mix evenly on top of the paper. Heat treat in the oven for 5 minutes, until the cake mix measures 165°F. This will ensure that there is no bacteria present. Let cool completely on a wire rack before combining with the cream cheese.
- Place the softened cream cheese in a medium mixing bowl and use a hand mixer to beat it until smooth.
- Add the cooled cake mix to the bowl and beat on medium-high speed until reaching a cookie dough-like consistency.
- Cover the bowl with plastic wrap and refrigerate for 2 hours.
- Line two baking sheets with parchment paper. Use a 1 ½ tablespoon cookie scoop to portion the dough and place onto the baking sheets. Roll each portion into smooth and even-sized balls with your hands. Set aside and allow them to rest for 15 minutes, so they are closer to room temperature, before dipping in the coating.
- Using a double boiler, melt the vanilla melting wafers on the stovetop over low heat, stirring occasionally, until smooth. You can alternatively place wafers in a microwave-safe bowl and cook on a low setting in 30 second increments, stirring between each cycle, until fully melted.
- Using a fork or chocolate dipping tool, submerge each dough ball one at a time into the melted wafers. Remove and gently tap the fork on the edge of bowl or pot to remove the excess coating from the ball. Place the coated ball onto the baking sheet.
- Finish coating the remaining dough balls, setting them 2 inches apart on the lined baking sheets..
- Place the red candy melts into a small microwave-safe piping bag and microwave on a low or defrost setting until fully melted. Massage the bag to mix around the contents and make sure the mixture is smooth and without lumps.
- Snip off a small piece of the tip of the bag and then drizzle onto the coated balls.
- Allow the coating to set completely before serving.
Notes
- To heat treat the cake mix in the microwave place the dry mix in a microwave-safe bowl and cook for 3 minutes, stirring the cake mix every 30 seconds, to ensure it is evenly heated and to avoid any hot spots.
- Don’t skip chilling the dough – it makes it easier to work with.
- Be sure to let the dough balls rest for about 15 minutes after rolling to avoid cracking. Cracking may occur if the dough is too cold and the melts are too hot.
- We recommend using the double boiler method to melt the vanilla wafers because it tends to keep the temperature consistent and helps to prevent seizing.
- If using the microwave to melt the wafers, keep in mind some melting wafers do not reheat well and they may thicken instead of melting.
- We recommend using high quality melting wafers like Ghirardelli vanilla or dark chocolate to coat the balls.
- Decorating option: add sprinkles immediately after drizzling on the candy melts.
- Store leftover cake balls in an airtight container in the refrigerator for up to 5 days.
Nutritional Estimate
Nutritional information is provided as a reference, using an online calculator. We recommend verifying the information independently for accuracy.