Disclosure: This post may contain affiliate links. Please read my Disclosure page for more information.
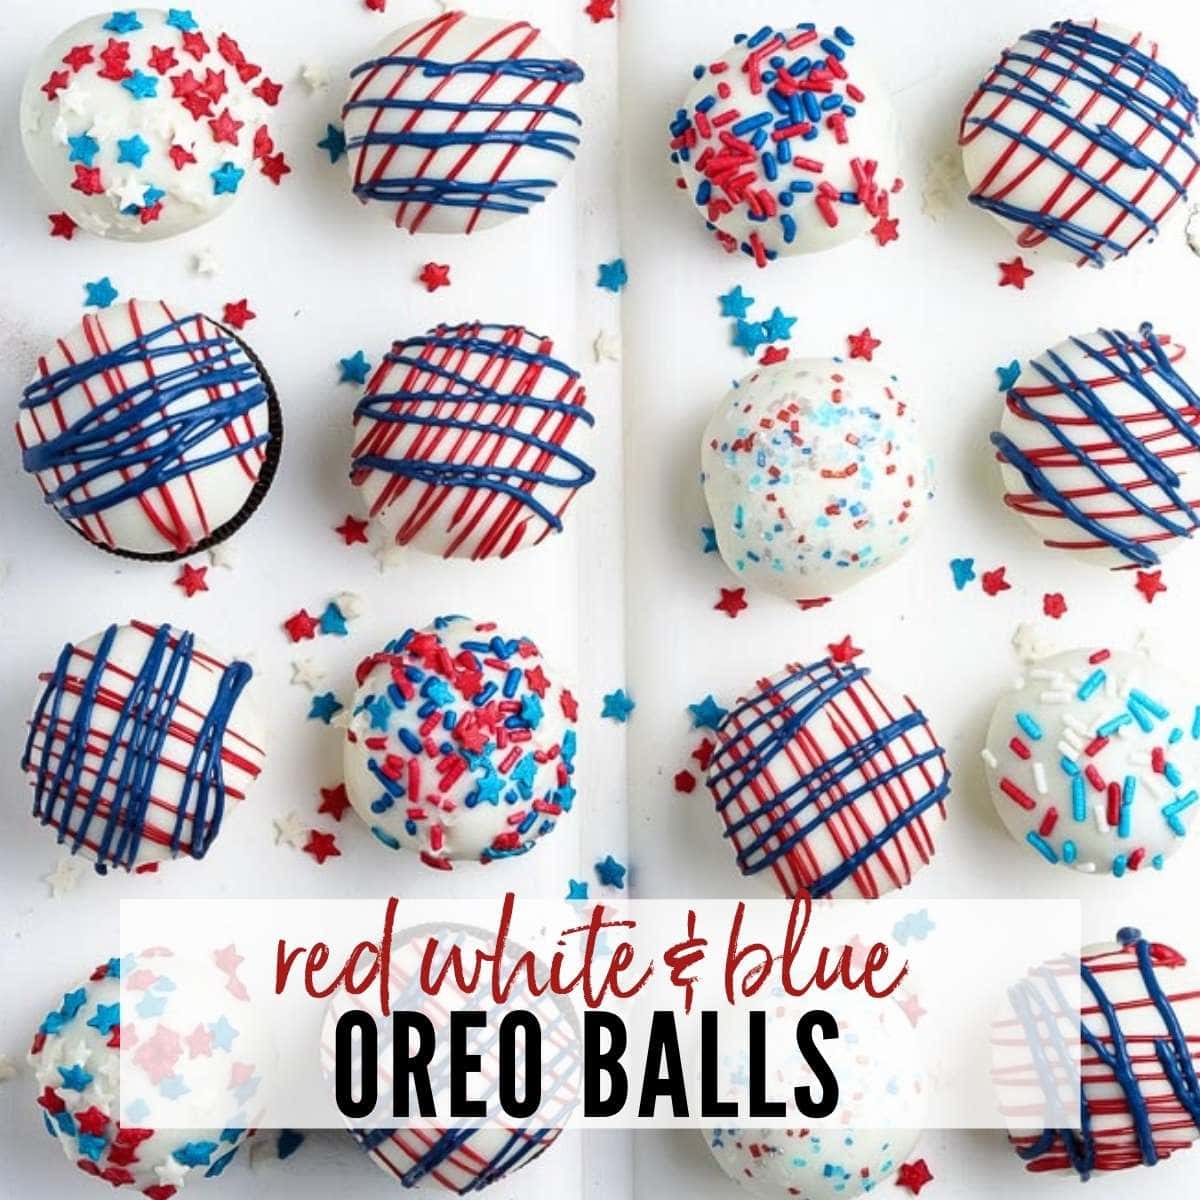
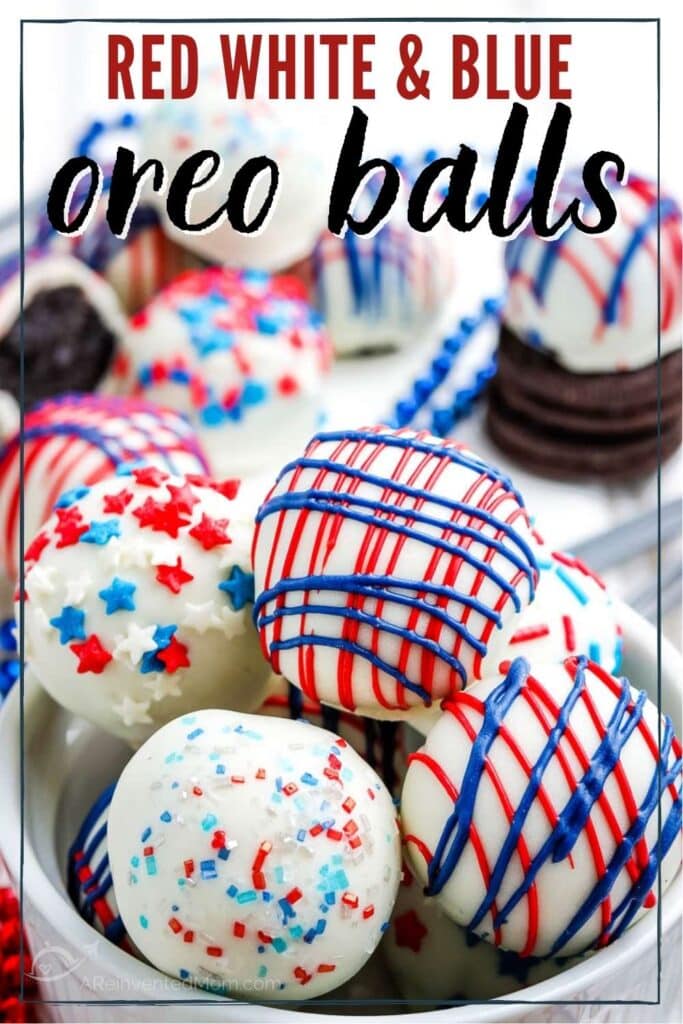
These Red, White, and Blue Oreo Balls are festive, patriotic, and oh so delicious. Make a batch for July 4th, Memorial Day, Labor Day, patriotic holidays or any time you need a tasty treat.
Warmer weather is just around the corner and that means the summer holidays will be here before we know it. And what better way to celebrate than with patriotic-themed desserts.
We’re sharing tips to help you get the best results with this recipe. If you don’t need the tips, scroll to the bottom for the full recipe and a printable recipe card.
I love hosting themed parties and color coordinating everything from the decorations down to the food. And my family loves Oreo truffles no matter what season it is, so I thought let’s make them red, white, and blue style. If you like Oreos, you’ll want to try these 4th of July Chocolate Covered Oreos – they’re easy to make and sooo pretty.
The last patriotic holiday I featured my Red, White, and Blue Poke Cake with Homemade Icing which always elicits oohs-and-aahs when you cut into it. We also like to make this fun Red White and Blue Charcuterie Board filled with semi-homemade desserts and Layered Angel Food Cake with Berries. For more festive recipes, be sure to check out our easy Memorial Day desserts.
If you know anything about me, you know that I love making easy recipes, especially desserts. And lemon flavored desserts like my No Bake Lemonade Pie and Lemon Cake Balls are perfect for the warmer months.
Let’s dive in and make the prettiest 6-ingredient Oreo balls you’ve ever had.
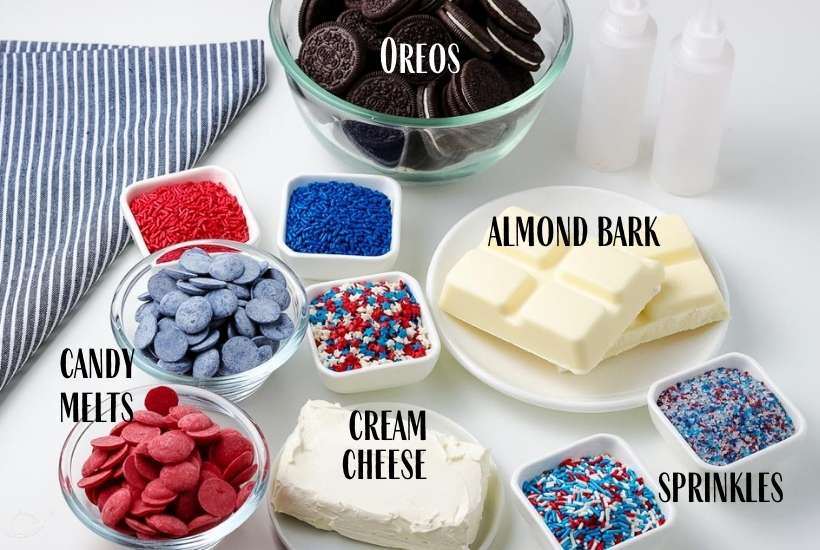
Ingredients to Make Red, White, and Blue Oreo Balls
Oreos cookies – one package should be enough and feel free to grab the double stuffed if that’s your fave
Cream cheese – allow enough time to let the cream cheese soften before using
Almond bark – this is used for the outer layer of white chocolate
Candy melts – you will need red and blue candy melts, for decorating
Sprinkles – these patriotic blends add a fun touch
Get the complete ingredients & directions in the recipe card below.
How To Make Patriotic Oreo Balls
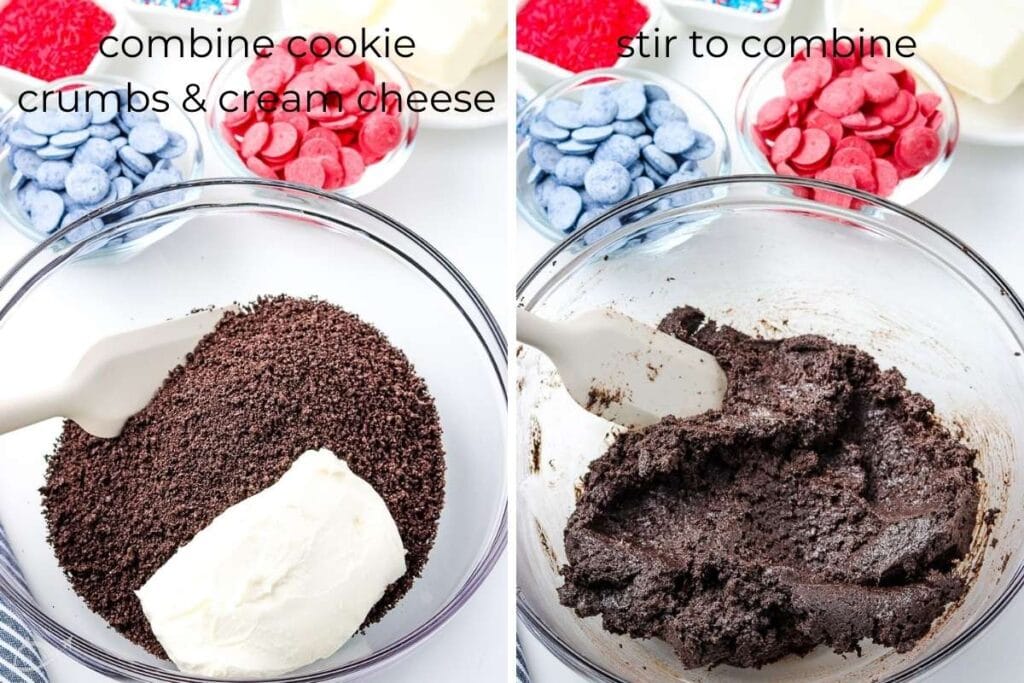
Use a food processor or blender to grind the Oreos into a fine powder. Transfer the Oreo crumbs to a medium sized mixing and mix in the softened cream cheese. A hand mixer makes this step super easy.
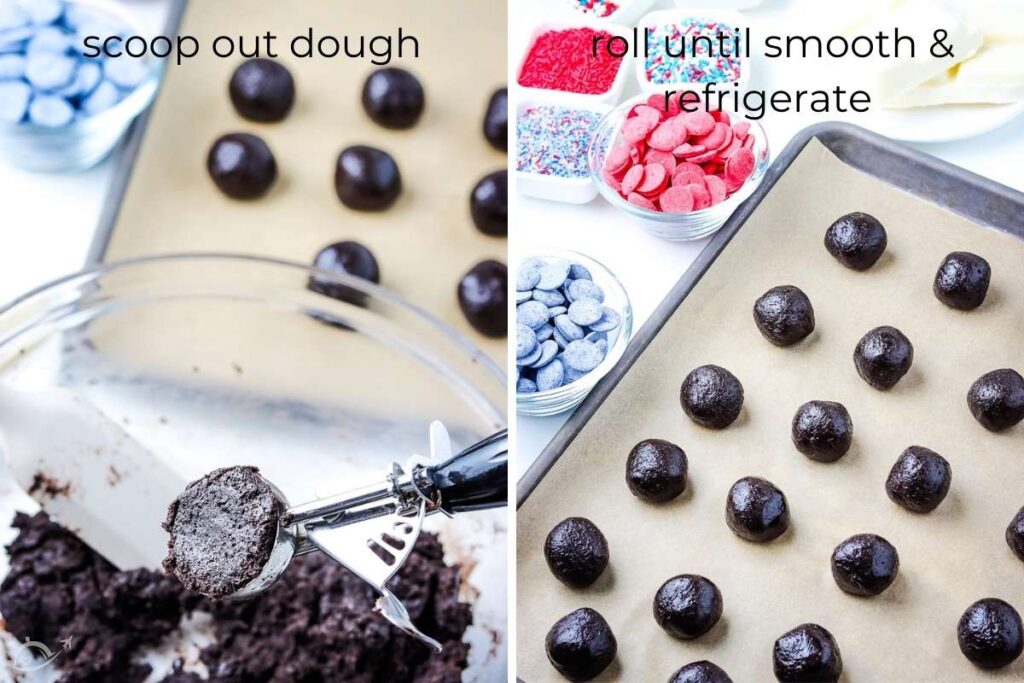
Scoop out the Oreo mixture with a cookie scoop and roll the dough between your hands to form a ball. Place onto a lined cookie sheet.
Once you have made all of the Oreo balls, place the cookie sheet into the freezer for about 30 minutes. This helps the chocolate to stick better and keeps them from falling part when you are dipping them.

While the balls are chilling, start preparing your chocolate. Melt the almond bark in one bowl, and the candy melts in separate dishes. Add the colored candy melts to separate squeeze bottles.
Start dipping the chilled Oreo balls into the white chocolate by lowering them on a fork and covering completely. Tap off the excess chocolate and place back onto the cookie sheet.
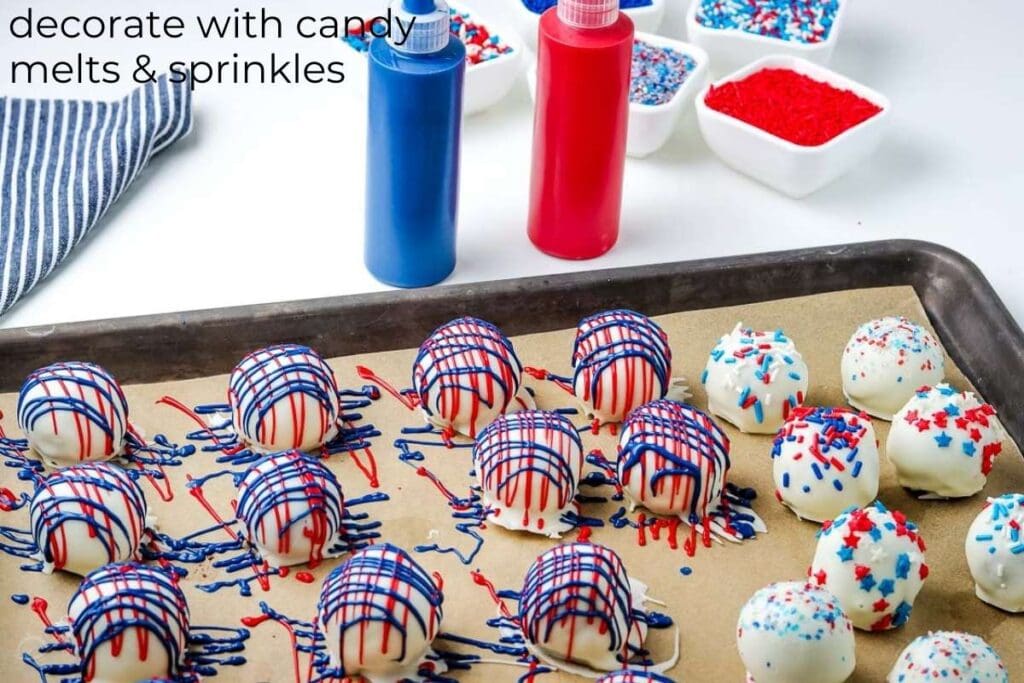
Drizzle the white chocolate covered Oreo balls with the red and blue melted candy. Add sprinkles before the chocolate dries.
Store in the refrigerator until ready to serve.
MORE RED WHITE AND BLUE
Easy Patriotic Recipes
Tips for Making Oreo Cookie Balls
- Don’t overheat your chocolate – it can seize or curdle.
- If you need to thin out the chocolate, add just a tiny bit of oil after it has been microwaved and stir to incorporate.
- Use a deeper container for the white chocolate – it’s easier to cover the Oreo balls with a deeper bowl.
- If you don’t have squeeze bottles, add the melted chocolate to a small Ziploc bag, seal the bag and snip off the corner of the bag.
How To Store and Freeze Oreo Truffles
These Oreo balls can be kept in the refrigerator for up to 3 weeks. You’ll need to keep them cool before serving due to the cream cheese.
Freezing Instructions:
If you are going to freeze the Oreo balls, do so before you decorate them. Store in a single layer in a Ziploc bag and separate with freezer paper or parchment paper if needed. Thaw overnight in the refrigerator. Decorate as desired.
More Easy Treat Recipes You Will Enjoy:
Enter your email & I’ll send it to your inbox. Plus, get great new recipes from me every week!

Red White and Blue Oreo Balls
Ingredients
- 36 Oreo cookies , from 1 pound 3 ounce package
- 8 ounce cream cheese, softened
- 1 pound white almond bark
- 6 ounces red candy melts
- 6 ounces blue candy melts
- Sprinkles
Instructions
- Line a baking sheet with parchment paper and set aside.
- Using a food processor (or a large resealable bag and a rolling pin), crush cookies into fine crumbs.
- Place cookie crumbs and softened cream cheese in a large bowl. Mix together until well combined.
- Using a small cookie scoop, form dough into ball shapes. Roll the balls between your hands until the surface is smooth. Place on the lined baking sheet.
- Refrigerate for at least 30 minutes.
- While dough balls are chilling, prepare the chocolate – break almond bark into squares and place in a microwave safe bowl.
- Heat the bark in the microwave for 1 minute, then stir chocolate. Continue heating for 10-15 seconds at a time, stirring after each heating cycle, until there are just a few small pieces of chocolate left. Stir until all the chocolate is completely melted.
- Using a fork, dip a chilled Oreo ball into the chocolate and tap off excess chocolate. Place on the lined baking sheet and let harden about 10-15 minutes. Repeat with a second layer of melted chocolate if necessary. Continue until all balls are coated. Allow chocolate to set & harden while you prepare the colored chocolates.
- Add candy melts to 2 separate microwave safe bowls. Start heating in microwave for 30 seconds, then stirring chocolate. Continue heating for 10-20 seconds at a time, stirring after each heating cycle. Stop when there are a few bits of chocolate left and stir until completely melted.
- Transfer melted chocolates to plastic squeeze bottles and drizzle Oreo truffle balls with red and blue chocolates.
- Immediately add sprinkles, before chocolate hardens.
- Store in an airtight container in the refrigerator until ready to serve.
Notes
- Recipe makes 20-25 truffles. The quantity may vary based on the cookie scoop size.
- Store in refrigerator for up to 3 weeks.
- Undecorated balls can be stored in the freezer for up to 2 months. To freeze, place a parchment paper between layers of Oreo balls.
- Recipe can be adapted for other holidays and occasions by changing the colors of the candy melts and sprinkles.
Nutritional Estimate
Nutritional information is provided as a reference, using an online calculator. We recommend verifying the information independently for accuracy.