
Disclosure: This post may contain affiliate links. Please read my Disclosure page for more information.
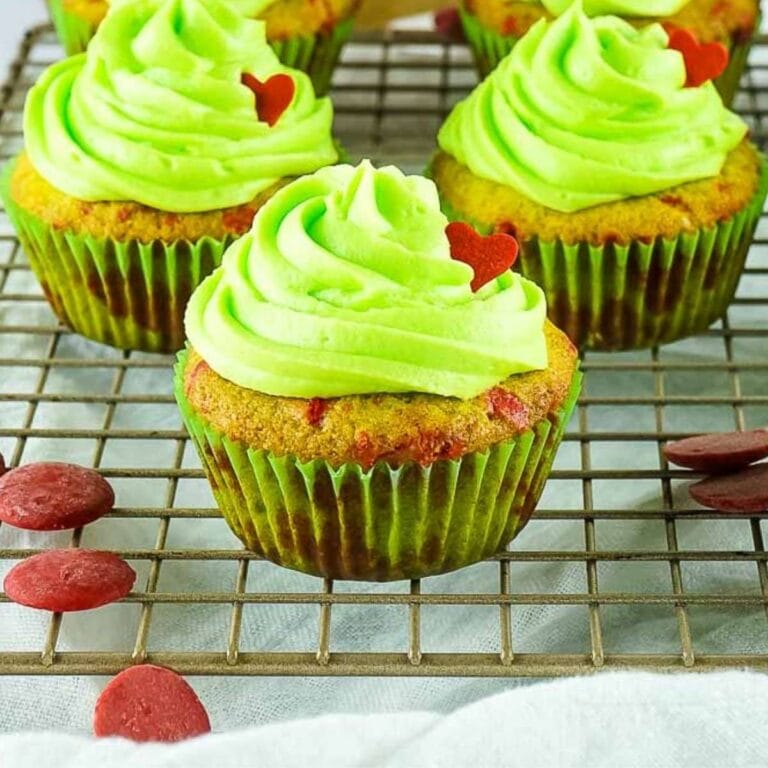
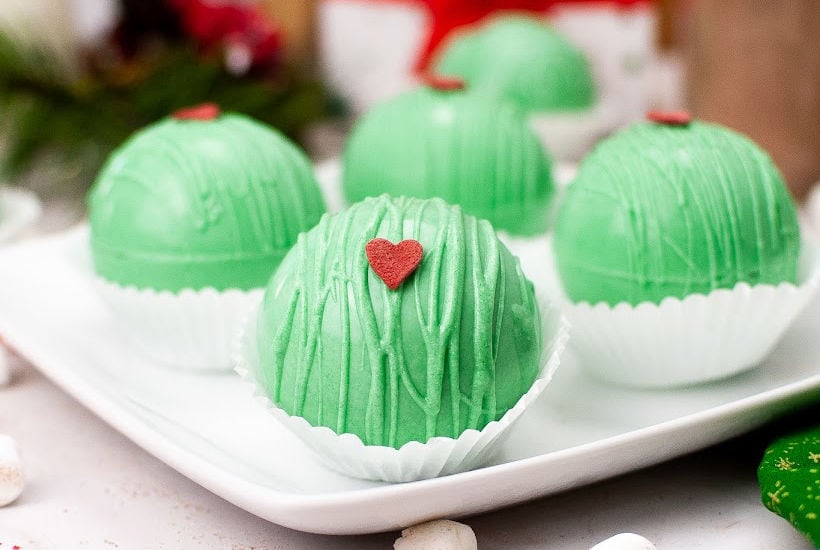
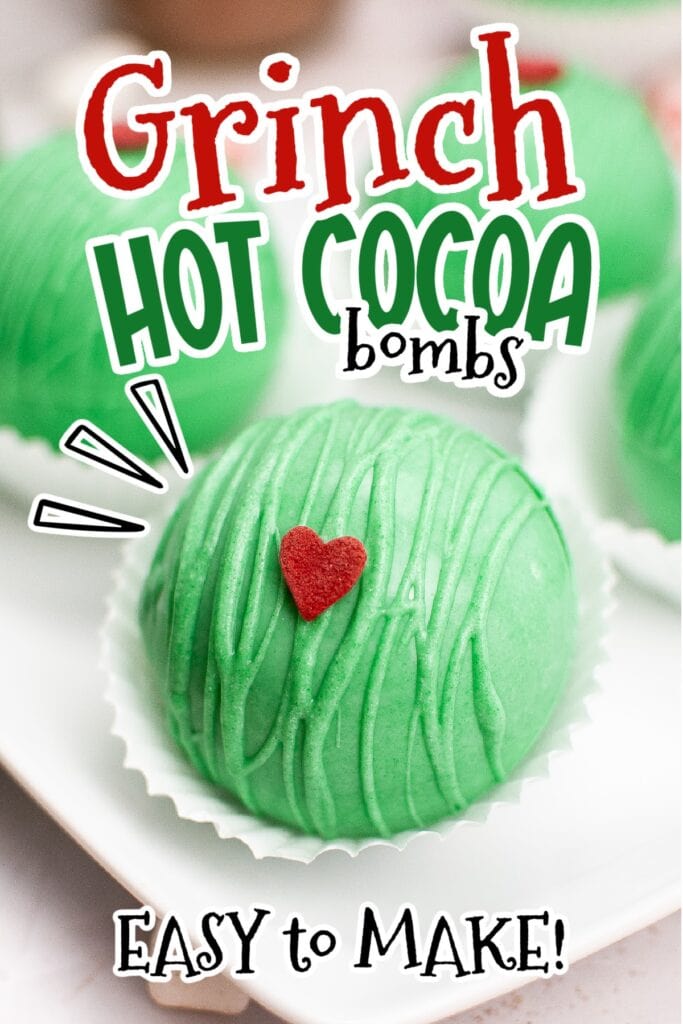
If you’re craving a bit of whimsy this holiday season Grinch Hot Cocoa Bombs might just be your answer. These festive and playful treats are easy to make and fun to watch as they melt into a mug of hot milk, revealing the sweet surprise inside.
Made with rich white chocolate, marshmallows, and topped with a Grinchy red heart, cocoa bombs are a fun twist on traditional hot cocoa drinks.
They not only taste great but have an eye-catching presentation that is sure to delight both kids and adults alike. And they’re a fun addition to your holiday parties, family movie night or to warm up on chilly winter days.

We’re sharing tips to help you get the best results with this recipe. If you don’t need the tips, scroll to the bottom for the full recipe and a printable recipe card.
Whether you’re sharing them with family or gifting them to friends, these Grinch hot chocolate bombs are sure to spread cheer. So, why not make your holiday gatherings a bit more magical.
Be sure to check out our Christmas hot cocoa bombs and hot chocolate bombs with marshmallows for more fun versions.
Who is the Grinch?
He’s a character known for his grouchy demeanor and eventual change of heart and has become a beloved symbol of holiday transformation. His story, “How the Grinch Stole Christmas!” is a timeless tale that captures the spirit of the season—reminding us that joy comes not from material possessions, but from the warmth and love we share.
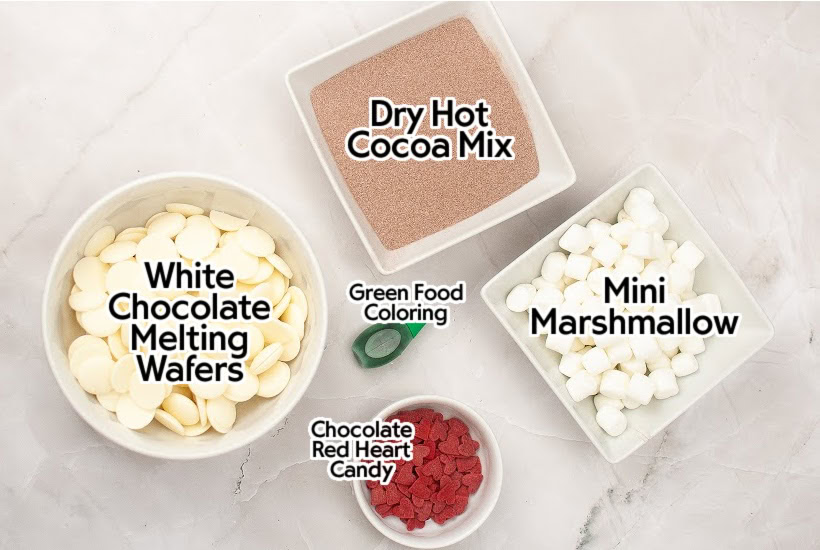
Grinch Hot Cocoa Bombs Ingredients
- White chocolate melting wafers: I use the Merckens brand wafers because they melt smoothly and don’t require tempering. White candy melts or green candy melts will work in a pinch too.
- Green food coloring: how much you use will depend on how bright you want the color to be.
- Dry hot cocoa mix: use your favorite brand.
- Marshmallows: you can use dehydrated marshmallows, mini marshmallows or cut up larger marshmallows in a pinch.
- Chocolate red heart candy: it wouldn’t be Grinchy without the red candy heart that grew 3 times.
- Milk: use whatever kind you have on hand, but you’ll get a richer cocoa with whole milk.
Get the complete ingredients & directions in the recipe card below.
How to Make Grinch Hot Chocolate Bombs
Making the Chocolate Spheres
Start by placing your silicone half sphere mold on a baking sheet or cutting board and put it aside for now.
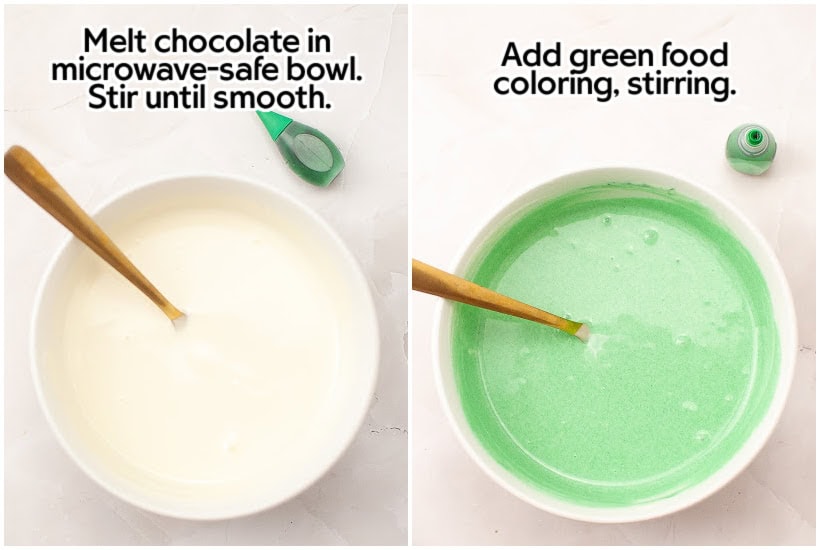
Grab a small, microwave-safe bowl and heat up your chocolate according to the package instructions, until it’s good and melted. Stir until it’s smooth.
Next, mix in 15-20 drops of green food coloring with the melted chocolate, adding 5-6 drops at a time. Stir well after each addition to make sure the color is fully blended in.
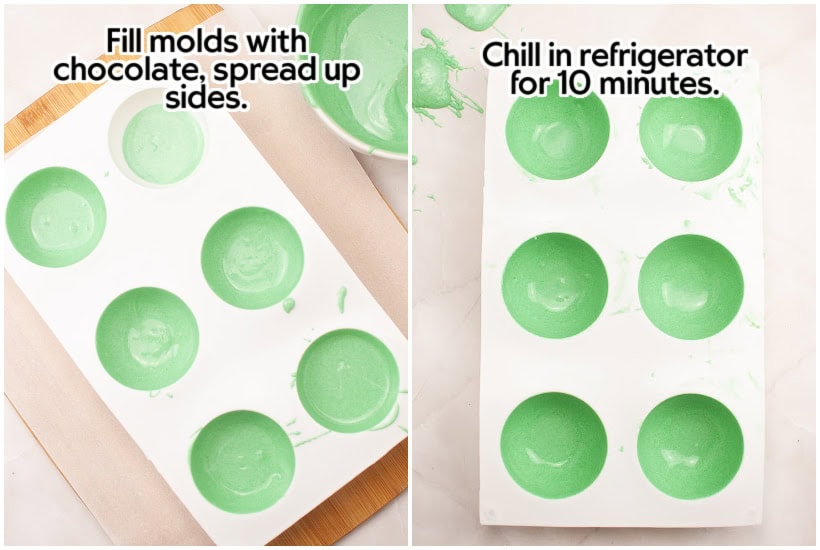
Spoon about a tablespoon of melted chocolate into each section of the mold. Use the back of the spoon or a food-safe decorating brush to spread the chocolate up the sides of the mold, making sure to create an even layer that covers everything.
As it starts to harden around the edges, add a bit more chocolate to thicken it up. If there’s extra chocolate sitting at the bottom of the mold, spread it up the sides or pour it out.
Pop the mold in the fridge for about 10 minutes to let it cool down. Once it’s set up, remove mold from the frig and flip it over so the rounded side is facing up.
Carefully press the center of each section with your fingers, and peel the silicone away from the chocolate shell. Be gentle to avoid cracking the chocolate spheres.

Assembling the Hot Chocolate Bombs
Warm up a small plate, and place the half spheres of the chocolate shell on it with the rounded side up. Let the edges melt slightly to create a smooth line, then put it on a cookie sheet. Do this with the other 7 shells.
Fill each shell half with 2 tablespoons of hot chocolate mix and 6-8 mini marshmallows. Take another empty shell and heat the edges on the warm plate. Carefully set it on top of a filled shell so that the melted edges meet and stick together.
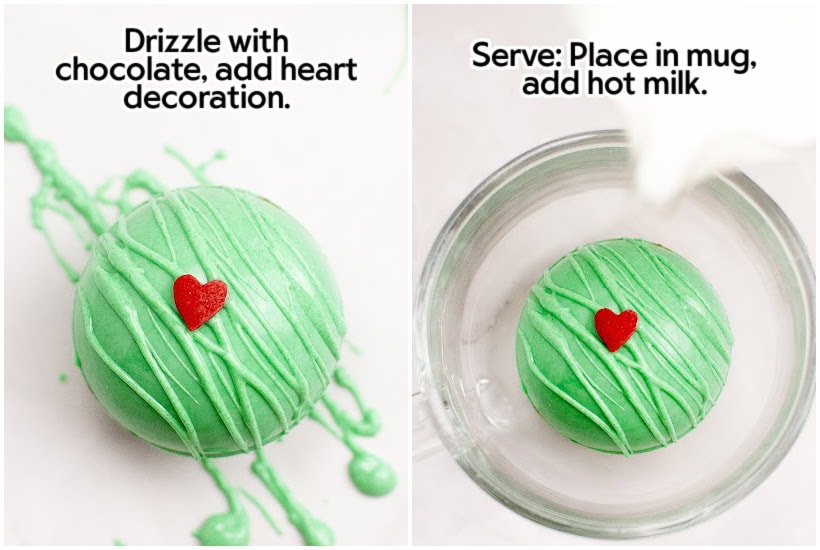
To decorate, drizzle some of the remaining melted chocolate over the top of the cocoa bomb using a spoon or piping bag. Immediately place a Grinch’s heart just off the top center, before the chocolate hardens.
How To Make the Hot Cocoa
Place the cocoa bomb at the bottom of a large mug. Slowly pour hot milk over the it for a rich comforting drink.
Tips for Making Hot Chocolate Bombs
- Consistent thickness: aim for a consistent chocolate thickness all around. Too thin and it might break; too thick and it becomes hard to melt in the milk.
- After removing the chocolate shells from the mold, flip the mold upside down and place the unfilled shells in between the domes to keep them from rolling around.
- Wear food-safe gloves while assembling to avoid smudges on the chocolate.
- Warm plate trick: use a warm plate to melt the edges for sealing. This technique creates a seamless bond and helps to prevents leaks.
- Check your seals: after sealing, check each one for gaps and do a quick touch-up with melted chocolate to fix any potential leaks.
Recipe Substitutions and Variations
- Use a white hot chocolate mix for a fun twist.
- For an elegant touch, add a simple drizzle of the green chocolate or a contrasting color. Use a fork or a squeeze bottle for flow control.
Cocoa Bomb Flavor Options
- Minty Fresh: add crushed peppermint candies to the cocoa mix.
- Spicy Kick: stir in a pinch of cayenne or chili powder with the cocoa. This twist will warm you up from the inside out, perfect for those who like a little heat.
- Sweet and Salty: mix in a sprinkle of sea salt and caramel bits (you can find these at the store but this is what you’re looking for) for a richer flavor profile. This combo is always a crowd-pleaser.
- Cookies and Cream: crumble some Oreo cookies into the cocoa mix for a classic pairing.
Can I make these treats ahead of time?
When the holiday rush is in full swing, prepping dishes in advance can be a lifesaver. And Grinch hot cocoa bombs are no exception – they’re an ideal make-ahead treat because they typically keep for a couple weeks. See the best way to store them below.
What to serve with Grinch Hot Chocolate
Whether you’re wrapping presents or hosting a holiday movie party, this recipe is perfect for a Grinchy kind of night. For more green treats, make some Grinch edible sugar cookie dough, Grinch snack mix, Grinch rocky road candy clusters and easy Grinch cupcakes to complete the vibe of the night.
How to Store Cocoa Spheres
You can store them in an airtight container on the counter for up to 2 weeks. If you’re stacking them, place a piece of parchment paper between the layers to prevent them from sticking together.
Can you freeze hot chocolate bombs?
You absolutely can! And freezing them can be a great way to prepare ahead for the holiday season because they’ll keep for 1-2 months. For best results, you’ll want to:
- Wrap Individually: start by wrapping each one in plastic wrap to keep them fresh, prevent moisture from seeping in and to protect them from freezer burn.
- Use Airtight Containers: place the wrapped cocoa spheres in an airtight container or a freezer-safe bag for an extra layer of protection.
More easy drink recipes…

Enter your email & I’ll send it to your inbox. Plus, get great new recipes from me every week!
Grinch Hot Cocoa Bombs
Ingredients
- 10 ounces white chocolate melting wafers, use Merckens or Ghirardelli for best results
- green food coloring, I used 20 drops
- 16 tablespoons dry hot cocoa mix
- 24 mini marshmallows
- red heart candy
For serving:
- 48 ounces hot milk, 6 ounces per cocoa bomb
Instructions
- Place the silicone mold on a baking sheet or cutting board and set aside.
- Following package directions, warm the chocolate in a small microwave-safe bowl, until melted. Stir until smooth.
- Add 15-20 drops of green food coloring to the melted chocolate, 5-6 drops at a time, stirring after each addition to fully incorporate the coloring.
- Spoon 1 tablespoon of melted chocolate into each well of the mold. Use the back of a spoon to spread the chocolate up the sides of each well and create an even layer that covers the entire mold. As the edge starts to harden, spread a little more chocolate to thicken the edge. If you have excess chocolate pooling in the bottom of the mold spread it up the sides of the mold or pour it out.
- Transfer the mold to the refrigerator and let it cool for about 10 minutes.
- Remove the mold from the frig and carefully flip it over so that the rounded side is facing up.
- Gently press the center of each well and peel the silicone mold away from the hardened chocolate shell. Be cautious to avoid applying too much pressure and cracking the shell.
- Warm a small plate, then place one chocolate shell half, rounded side up, on the heated surface. Allow the edge of the shell to melt slightly until it creates a smooth and even edge and place it on a cookie sheet. Continue with 7 more shells.
- Fill the halves with 2 tablespoons of hot chocolate mix and 6-8 mini marshmallows.
- Take an unfilled shell and place it on the heated plate to warm the edges. Carefully position it on top of a filled shell, so the melted edges of the chocolate will meet and serve as a "glue" to secure the two halves together.
- To decorate: drizzle remaining melted chocolate over the top of the cocoa bomb and apply the red heart offset from the top center before the chocolate sets up.
- To serve: place the cocoa bomb at the bottom of a large mug and slowly pour hot milk over it for a rich hot cocoa.
Notes
- Adjust the amount of green coloring for your preferred shade.
- After removing the chocolate shells from the mold, flip the mold upside down and place the unfilled shells in between the domes to keep them from rolling around.
- Make sure you create a consistent chocolate thickness, not too thin and not too thick.
- After sealing the orbs, check each one for openings. Dab on a little melted chocolate to close any openings.
- Store cocoa bombs in an airtight container on the counter for up to 2 weeks.
- Nutritional information does not include milk to make the cocoa.
Nutritional Estimate
Nutritional information is provided as a reference, using an online calculator. We recommend verifying the information independently for accuracy.