Disclosure: This post may contain affiliate links. Please read my Disclosure page for more information.
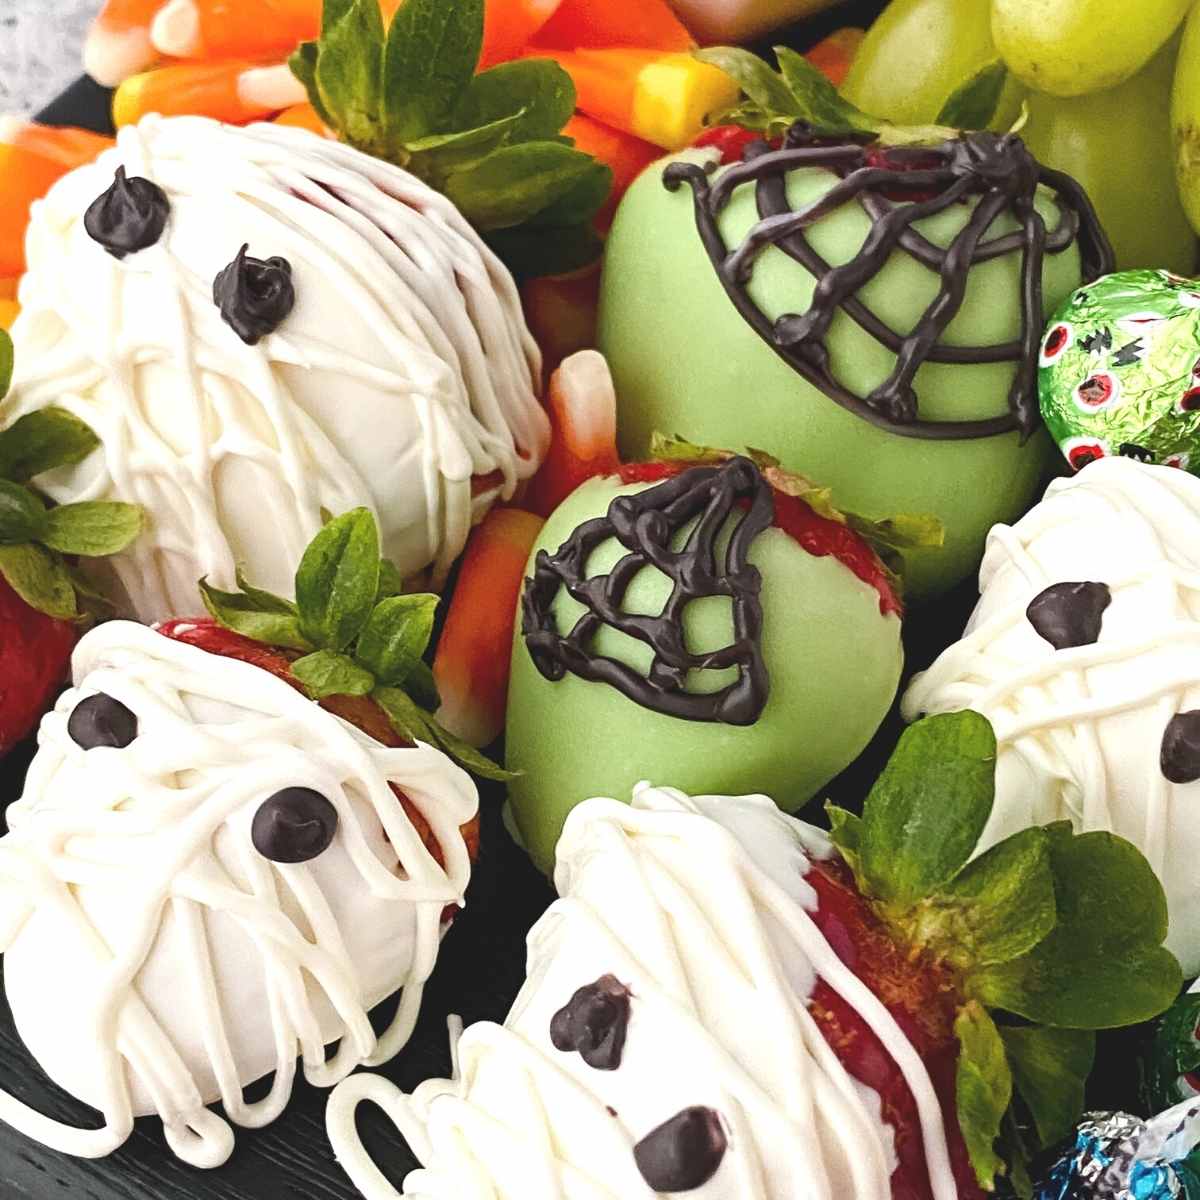
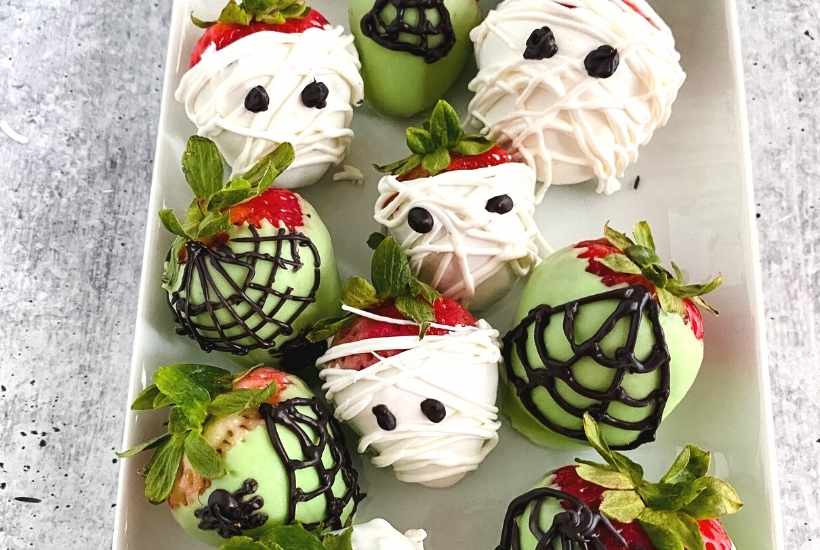
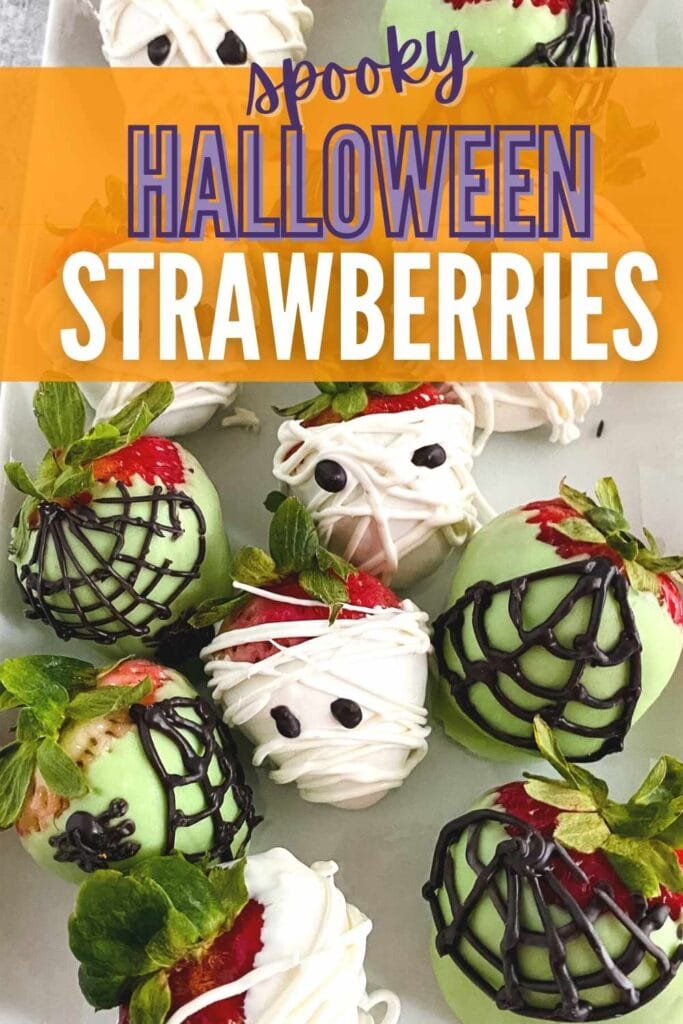
These Halloween Chocolate Covered Strawberries will add a spooky touch to your menu. They’re also great to serve at Halloween parties or to even let your guests decorate! And it’s a fun addition to this Halloween charcuterie board.
When you think of Halloween, typically fruit doesn’t come to mind. Most of us think of huge amounts of candy. And nagging our kids to brush their teeth after consuming all those sugary treats.
We’re sharing tips to help you get the best results with this recipe. If you don’t need the tips, scroll to the bottom for the full recipe and a printable recipe card.
Today I am sharing a tasty alternative to the candy – spooky chocolate-covered strawberries! The options don’t end with mummies and spiders. You can also decorate them as jack-o-lanterns, Frankensteins, or just with festive sprinkles.
Do you have tweens and teens in the house? That can be a difficult age group to cater to, so I put together a guide for how to create an Unforgettable Halloween Party Ideas For Tweens & Teens. I cover fun things to do and a few things NOT to do. You can thank me later.
And you don’t want to miss 70+ Easy Halloween Party Recipes & Decorations – lots of great stuff for this spooky holiday.

Halloween Chocolate Covered Strawberries Ingredients
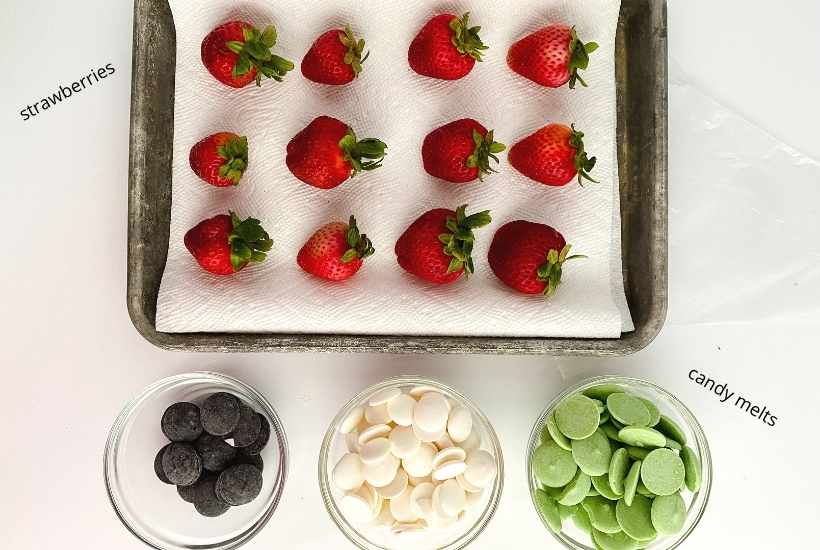
- strawberries – you’ll want to select firm but juicy, ripe berries. The amount will depend on how many you want to make, but with the ingredients listed here you can make about 12.
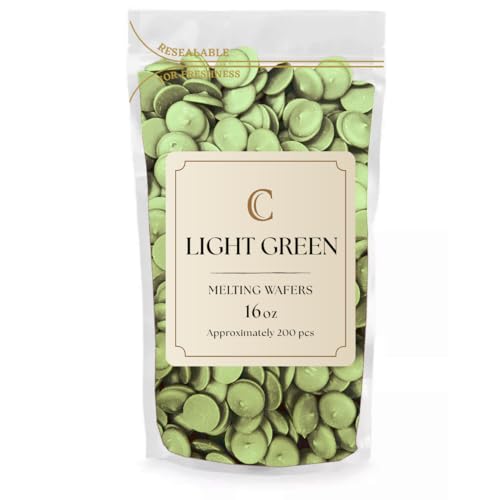
- candy melts: neon green, white and black. If you want to change up the colors, you totally can! Just grab candy melts in the colors of your choice.
- coconut oil or vegetable oil – optional but it thins the chocolate and makes it easier to dip the berries.
Gadgets Needed
Get the complete ingredients & directions in the recipe card below.
How To Decorate Chocolate Covered Strawberries for Halloween
Line a baking sheet with parchment paper. Rinse and dry your strawberries and place on the baking sheet.
You’ll need 3 small microwave-safe bowls, one bowl per candy color. Follow the instructions on the packages to melt the candy melts.
DO NOT overheat your chocolate! It will seize and be ruined.
Pro Tip: adding a small amount of coconut oil or vegetable oil to the candy melts will help thin out thick chocolate. Stir the chocolate making sure no lumps remain.


For the Mummy Berries:
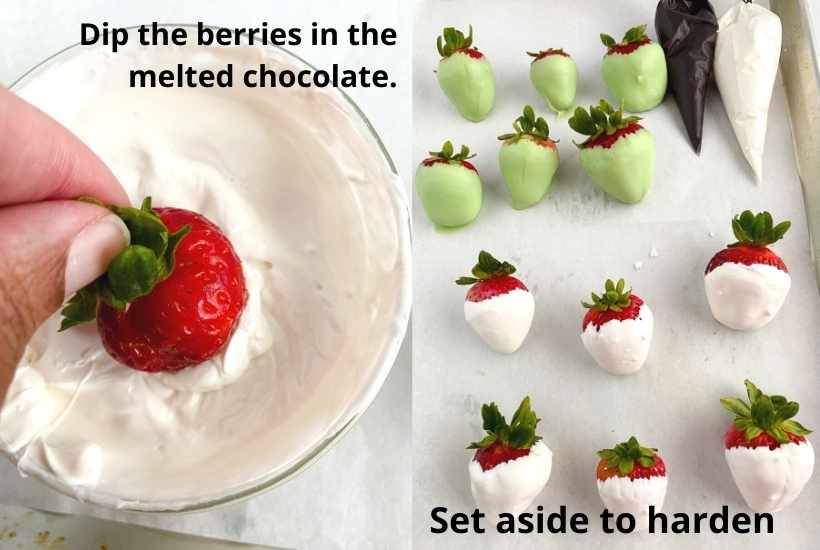
Once you’ve melted the white chocolate, carefully dip the strawberries. Place the coated berries on the lined baking sheet until the chocolate hardens.
Pour the remaining white chocolate into the piping or Ziploc bags and cut a small hole on the end. If you are using a Ziploc bag you will be cutting one of the corners.
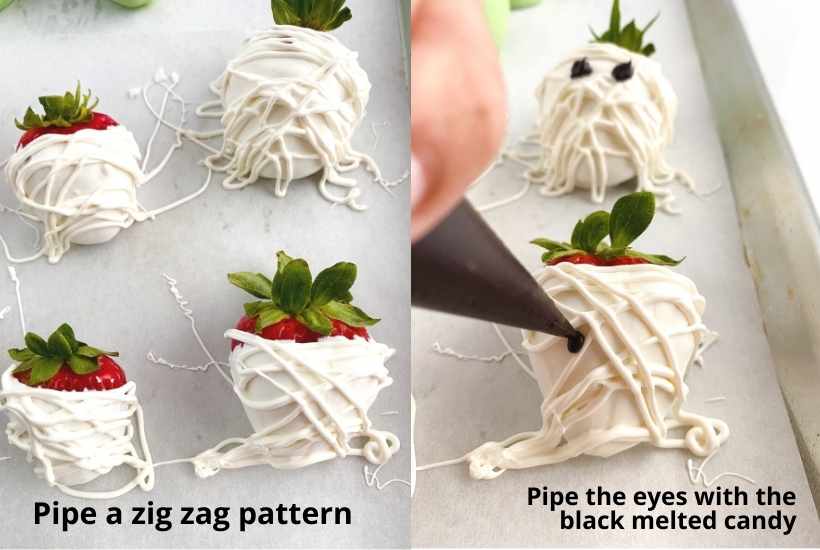
Gently squeeze the bag in a zig-zag pattern to make the mummy strips across the berries.
Prepare another bag with melted black candy melts, and pipe the eyes on.
Before serving or storing, allow the chocolate to set up by leaving it on the baking sheet.
For the Spider Berries:
Dip the remaining strawberries in the melted neon green chocolate, letting them rest for a few minutes on the baking sheet.
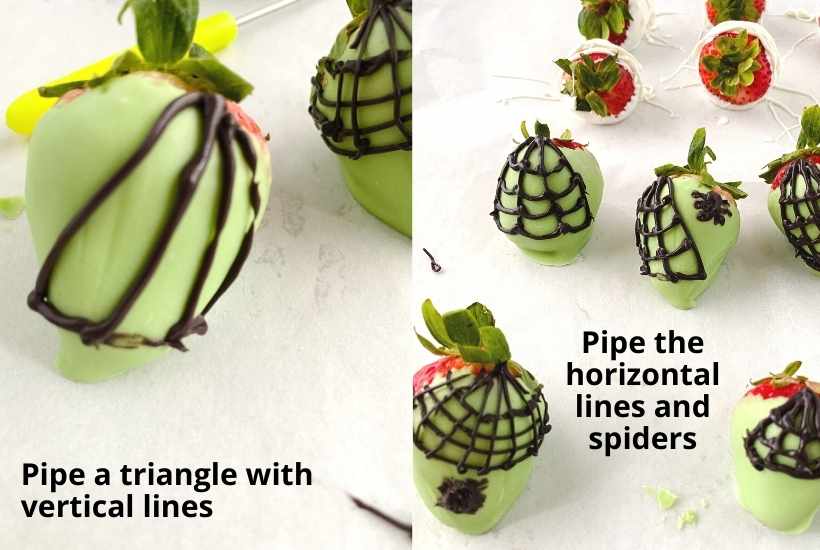
Using the black candy melts, pipe a triangle on the strawberry then make vertical lines inside of the triangle. Finish it with horizontal lines – the idea is to create a web appearance.
Pipe some spiders if you’d like, then letting the berries harden on the baking sheet.
How long do chocolate covered strawberries last?
Like fresh berries, these have a short shelf life. Chocolate coated berries will last for 1-2 days before getting too soft.
Can I freeze chocolate covered strawberries?
The short answer is no. The strawberries will release their juices as they thaw making them an inedible mess.
Tips for Storing Leftover Halloween Strawberries
- These can be made a day in advance to cut down on the stress of preparing for a Halloween party.
- Store the berries uncovered in the refrigerator. A single layer is best but you can place a piece of parchment paper in between the layers if you need to do a double layer.
More Easty-to-Make Fall and Halloween Treats:
- Halloween Snack Mix
- Hot Chocolate Bombs with Marshmallows
- Dalgona Cocoa {Whipped Hot Chocolate}
- S’mores Rice Krispie Treats {No Bake}
Plan a spooktacular party with our printable planner – over 20 pages & on sale now!
Enter your email & I’ll send it to your inbox. Plus, get great new recipes from me every week!
Halloween Chocolate Covered Strawberries
Ingredients
- 12 large strawberries
- 1/4 cup neon green candy melts
- 1/4 cup white candy melts
- 2-3 tablespoons black candy melts
- coconut oil or vegetable oil , optional
Instructions
- Wash the strawberries and thoroughly pat dry with paper towels. Place on a parchment paper lined baking sheet.12 large strawberries
- Using 3 small bowls, melt the candy melts according to package instructions. Be careful not to overheat the chocolate. Stir the chocolate to make sure no lumps remain.1/4 cup neon green candy melts, 1/4 cup white candy melts, 2-3 tablespoons black candy melts
- *Tip – adding a small amount of coconut oil or vegetable oil to the candy melts will help thin out thick chocolate.coconut oil or vegetable oil
For the Mummy Berries:
- Dip each berry in the white candy coating. Let sit on parchment paper lined tray for 10-15 minutes or until set.
- Add remaining white candy to a piping bag or ziplock bag and cut a small hole in the tip.
- Create lines back and forth and diagonally across the chocolate coated berry.
- Pipe on eyes with black chocolate.
- Allow to set on parchment lined tray for 5-7 minutes, until chocolate has hardened.
For the Spider Berries:
- Dip each berry in the neon green candy coating. Let sit on parchment paper lined tray for 10-15 minutes or until set.
- Using the black chocolate, pipe a large triangle on the chocolate covered strawberry. Then pipe vertical lines inside the triangle, followed by horizontal lines between the spaces left on the vertical lines to make the spider web.
- Allow to set on parchment lined tray for 5-7 minutes, until chocolate has hardened.
Notes
- Change up the colors and patterns for other holidays and celebrations.
- Berries can be made up to a day ahead of time. Store them in a single layer and uncovered in the refrigerator for 1-2 days.
- Optional ingredients are not included in Nutritional Information.
Nutritional Estimate
Nutritional information is provided as a reference, using an online calculator. We recommend verifying the information independently for accuracy.